
A big number of software products and components which are created and released today can be regarded as completely web-oriented utilities created to perform particular tasks in the world wide web.
Developing a web product means using numerous possibilities from different fields and sciences such as operating a big amount of data, functioning of computing systems, creating network security, design, etc.
It’s testing that is quite important and fundamental part of software product development.
Permanent growth of lines of a program code and also increase in a number of developers leads to a bigger number of technical errors in the process of developing a program component.
It’s testing that helps us to find errors as soon as possible, before an application will be released. Speed, with the help of which you can quickly identify such problems, completely depends on the testing approach you choose, a number of testers, their total experience and also on tools you choose to use in the process of finding the bugs.
There are many approaches to testing automation.
You can often hear such abbreviations as KDT, DDT and BDD. And most testers follow such approaches in the process of building the methodology of testing a software product.
The Sense of Keyword-Driven Testing
Keywords driven testing is a specialized approach when particular keywords are used, thoroughly describing a set of performed actions which are anyway needed to complete a particular stage of the test script.
Firstly, a set of keywords is formed, then associations (particular action or function) connected with this keyword. It means that every such step of the test, for example, opening and closing a browser icon, mouse click on an object is described by a special keyword – open browser or click.
In the process of keywords driven testing, there is a possibility to create simple functional tests on any stage of a software product development testing different parts of an application.
A very simple way to create such a test is to record it. After recording, it can be edited and configured according to the necessary requirements.
In the process of test cases execution, all keywords are interpreted according to a test library used.
Main stages of creating the keywords tests:
- creating a list of keywords;
- using keywords as executed files;
- creating a group of test cases;
- work with scripts;
- work with automated scripts.
Advantages of such a form of testing:
- This approach allows a group of functional testers to plan and perform automated testing before a developed product will be on the final stage.
- All tests can be developed without special knowledge of programming languages.
- This approach does not depend on notions and definitions of any programming language or a special web tool.
The Test on a Basis of Keywords in TestСomplete 7
Beginning from version 7 of TestComplete, a product can automatically record so-called Keywords Driven test.
Hereinafter, we will use a short name of the KD test.
The Process of Test Recording
Firstly, let’s create a simple KD test. For this, you need to right-click on a project, namely on KEYWORDSTESTS element and choose a special menu item – ADD – New Item.
In creative project item, you should enter a name of a new test (let’s call it KDTI).
After this, a new panel of KD test will be opened in TestComplete.
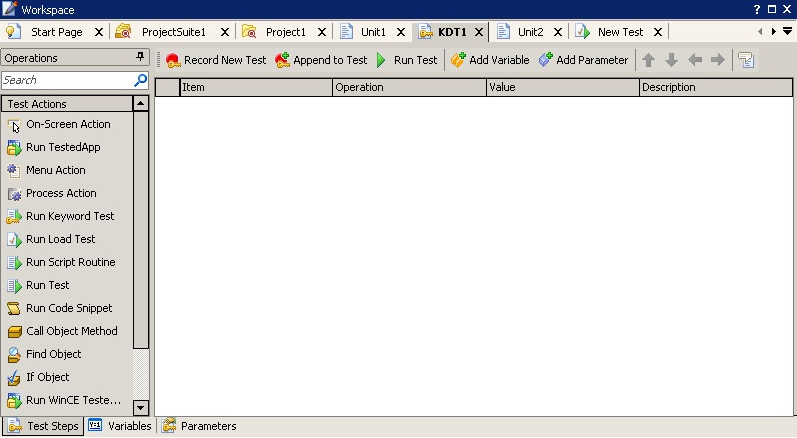
KD Test Panel
So we have an absolutely empty test which can be easily edited (we will talk about this a little bit later).
Now our task is to record a test using available capabilities of the TestComplete program.
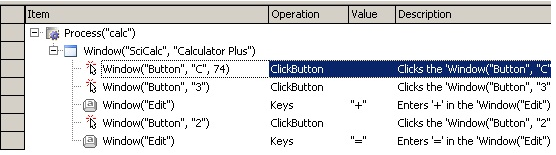
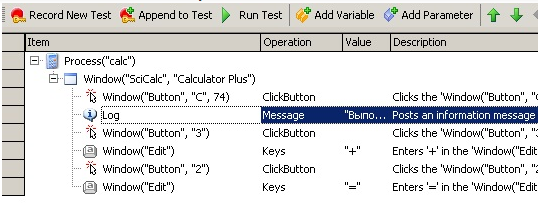
Go to the toolbar in the upper part of the dialogue box and click on the Record New Test button. In our case, we will try to record simple mathematical operations on a simple calculator (for example, add 2 to 3). As a result, we get such an interesting script:
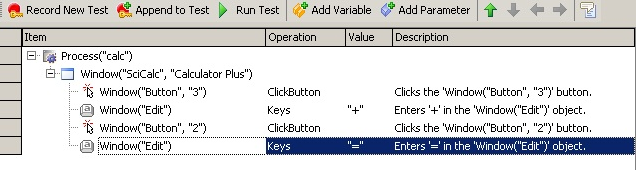
A Script
In the whole item column, we can see a name of the object with which a system interfered, in the Operator column – a current operation (for example, ClickButton – imitation of clicking on a button), in the Value column – an established parameter of the operation (for example, a name of a button, in our case) and in the Description column – description of the current operation. And if we used NameMapping in such project, a value in the item column would be clearer and more readable, for example:
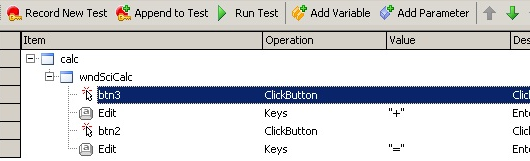
A Value in the Item Column
Let’s imagine that we want to clear a calculator’s field before performing the next operations. For this, you need to click on the Cancel button.
To add a particular step in the already created test, use a special Append to Test button located on a toolbox. As soon as you click on it, you will go immediately to a test record mode, record all performed actions and finally, they will be added at the end of a previously created and saved script.
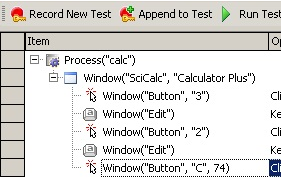
The Performed Actions
Special buttons with arrows allow us to move any added action to a necessary line. In our case, we will establish a calculator’s field clear before performing the necessary calculations.
Buttons with Arrows
The Run Test button allows us to run our test and be sure that everything works as needed.
The Run Test Button
The Processes of Modifying Previously Recorded Tests
The main difference between a simple test from the ones of KDT group is that the second help to perform the same operations but on the basis of a special visual editor which is used instead of a system of writing a program code. Also, you can use special cycles, name search, special settings and also use conditional expressions for original blocks of interceptions and exceptions.
Let’s start with the simplest and clearest actions. For example, from the process of adding the information to a message log (Messenger).
In the left part of the KDT toolbox, there is the Operations block which helps us to add new actions and tests to the system.

The Operations Block
Here the operations are classified into special logical groups:
- Test tasks – operations with control units, work with menu and also a process of searching the objects;
- Logging – work with logs;
- Check-point – creating and adding check-points;
- Statements – creating a group of conditions or cycles;
- Miscellaneous – other technical capabilities (delay of scrolling, indicator’s operating).
Let’s first perform a very simple action: the process of displaying in a log the “action 3+2” message. For this, you need to move the Log Message element from a panel on such a line of the script where we need this message to be displayed.
Right after this, we will see a special dialogue box where the parameters are established:
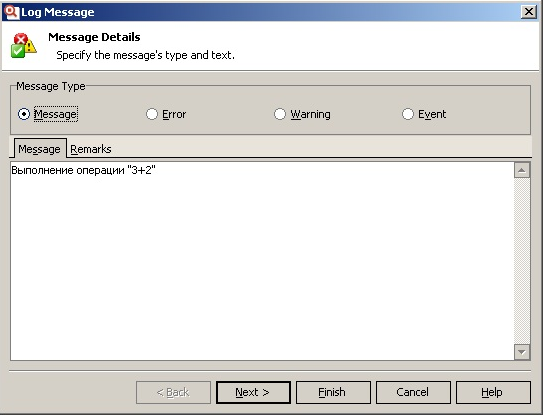
A Log Message
In this window, we will specify what type of a message must be used and we can add a text to it if we wish.
Next, we click on the Finish button and end the action or click on Next to immediately go to the second page of the dialogue box where we can study all parameters and edit their values if needed.
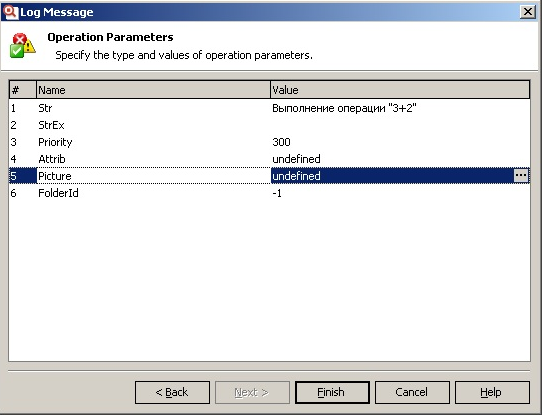
Operation Parameters
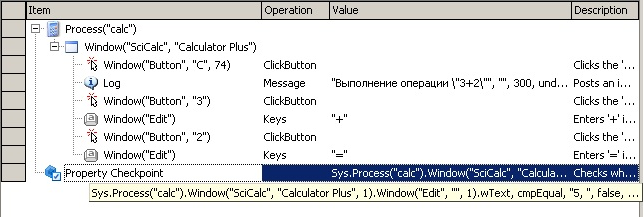
As a result, our project will get a finished structure:
A Finished Structure of the Project
Similarly, we add all other elements of the scripts. For example, now we want to test a value as soon as Calculator will finish the action.
In the same way, we move a necessary element from Operations in a place where we need to perform testing and on the basis of a special Finder Tool we mark a special text field and then click on Next.

Create Property Checkpoint
On the next page of the Create Property Checkpoint window, we mark a necessary action and click on Next. On the third page, we choose a necessary test condition. In our case, we mark the “Equal” parameter.
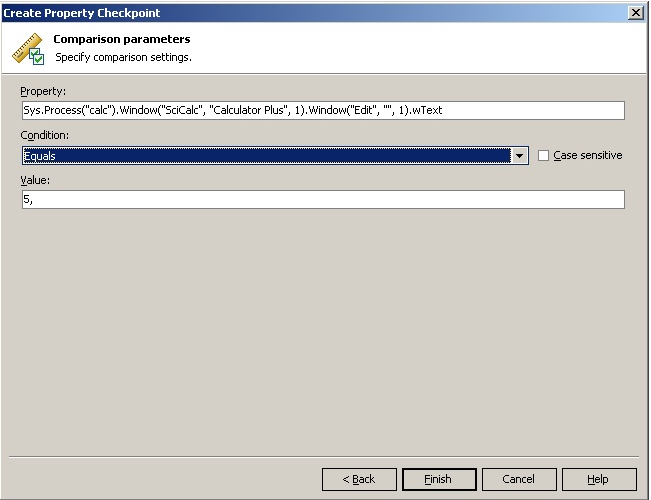
Comparison Parameters
The Equal Parameter
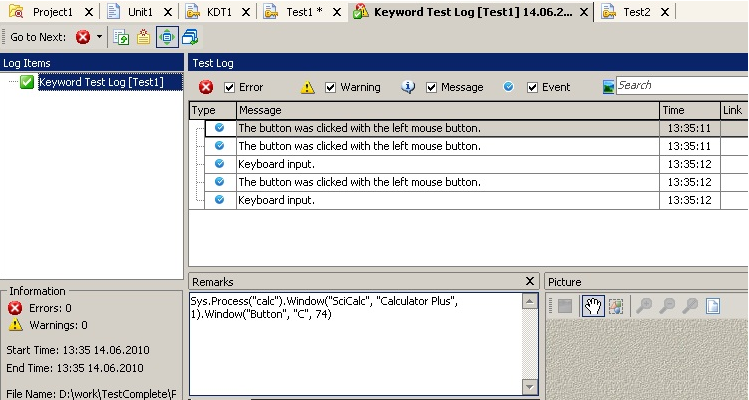
Let’s run our test one more time to be sure that everything functions properly. As a result, we can see the results of the work of our script:

The Results of the Work of Our Script
A Process of Converting the Keyword-Driven Tests
Though KDT tests are absolutely simple and clear, not all operations can be performed only with their help. In some way it is caused by particular differences in developing certain programming languages and in some way – because only with the help of classical programming language we can create completely complex constructions but not operating only KDT.
So if you wish to use a recorded KDT test on the selected programming language, you will need to make a conversion.
To convert KDT documentation into a simple test, you need to right-click 3 times and choose the special Convert to script item.
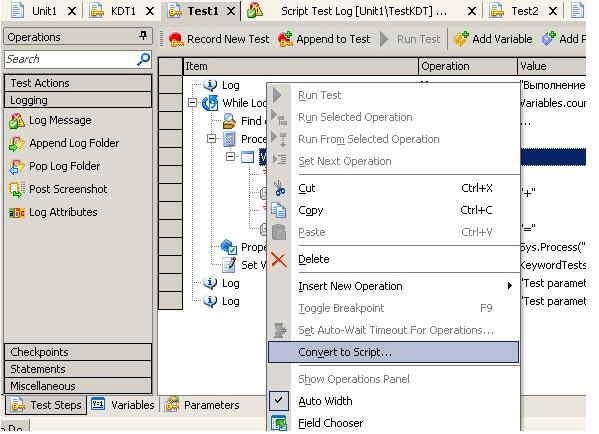
Convert To Script Item
Then in the opened Specify Routine Name window, choose a particular module and enter a name of a function where a text will be converted.
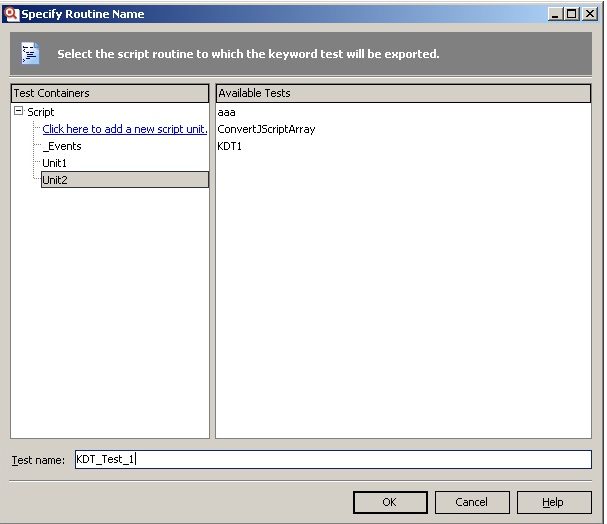
Specify Routine Name Window
As a result, we get the following script:
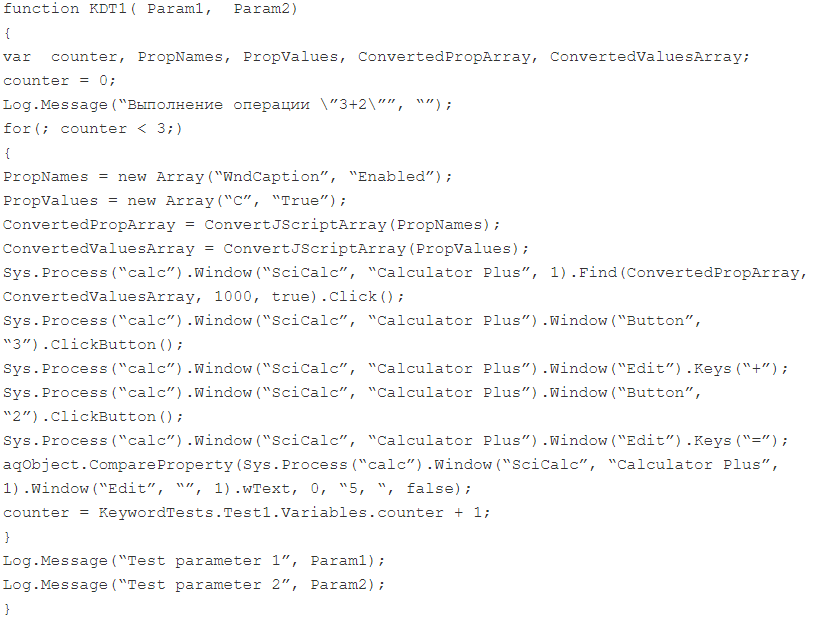
An Example of the Script
As we can see, nothing difficult and with correct building and optimizing the testing processes, you can prepare the wide environment in which you can simultaneously use several types and kinds of testing. Since as we know QA as a service is not just testing all the functionality but also a work with many components on the basis of numerous tools and methods.


Leave A Comment