
There is almost no information on the net on configuring SpecFlow BDD framework to identify user stories. Moreover, there is little information on performing automated testing with SpecFlow.
Nevertheless, there’s a lot of skepticism that it is not easily done. Taking such tendencies into account, it’ll be quite useful to analyze the functioning of the mentioned framework in the context of creating the original base of automated tests with which you can quickly and accurately assess the functionality of the product in development.
Further information will be useful for those who:
- Want to assess the possibilities of using the “Specification by Example” methodology during automated tests and want to describe themselves the features and steps exclusively in Russian;
- Want to be very effective in using Behavior Driven Design for their project
Identifying the Task
So, let’s imagine that we have the task to quickly automate the testing of the main functionality of a web product that is created in a company whose services are aimed at customers from Eastern Europe and the CIS countries. The product is used on the market for many years, and its documentation is equal to hundreds of pages of technical text.
Releases are held on a regular basis, there are a lot of bugs and there are not enough experienced QAs in the company (using independent testing services is financially unprofitable).
The test manager agreed to use the Specification by Example – the most up-to-date tools of automated, deciding to provide in future all the necessary functionality, interaction with which will allow achieving the maximum amount of code coverage with tests.
Everything should be recorded in a form of classic and client-friendly user stories.
What then? Everything’s simple – describe in details the test cases in the feature-documents and “adjust” them to the automated tests.
Step-By-Step Specification
What’s required?
- IDE under .Net. Our specification is created for the English version of Visual Studio 2012. In all other IDEs, you can work in the same way.
- Select and install the Test Runner, if it has not already been added to the system. It is recommended to use NUnit. By the way, SpecFlow completely interacts with other applications to run tests.
Stage 1. Installing the SpecFlow
Go to Tools – Extensions and Updates.
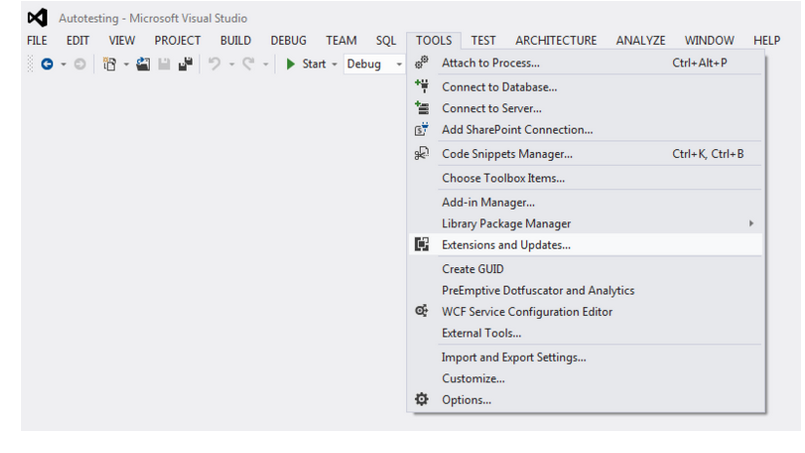
Specflow Installation
Then move to Online and find the SpecFlow there.
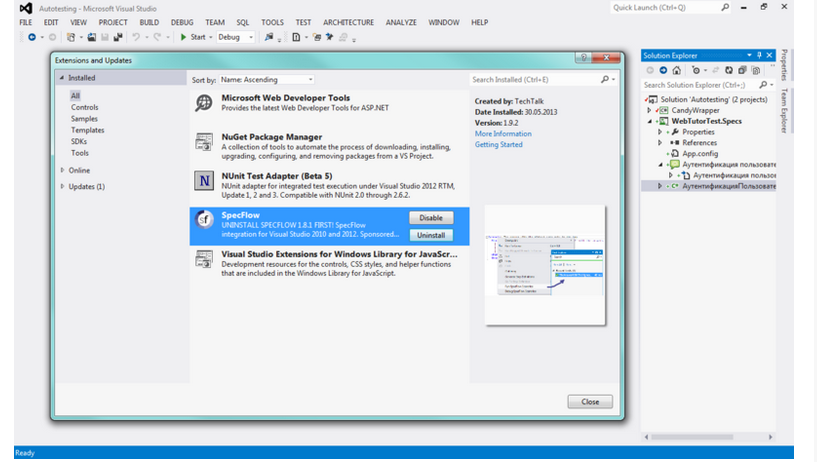
Installing the Specflow
Install the library. The program will “remind” you about restarting the Visual Studio
Stage 2. Creating the SpecFlow Configuration File
You can easily omit this stage if:
- You have only 1 task to do and you can easily do without test builds. In this case, on stage 3, just copy the contents of the following config and paste it into your own.
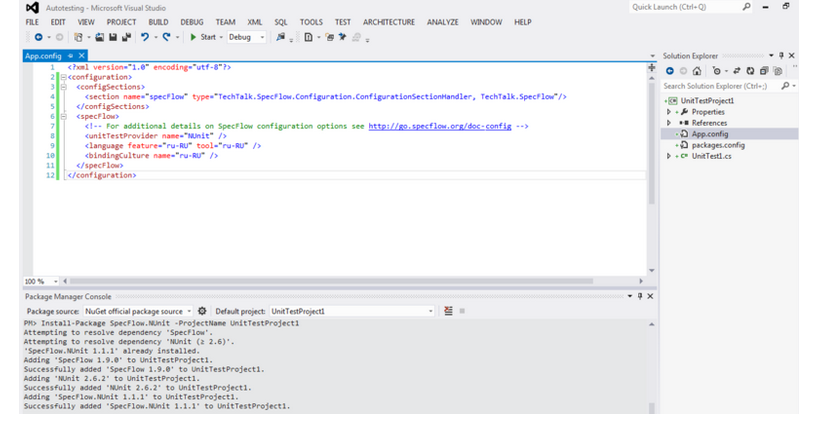
You should prepare the App.config file with the following content beforehand:
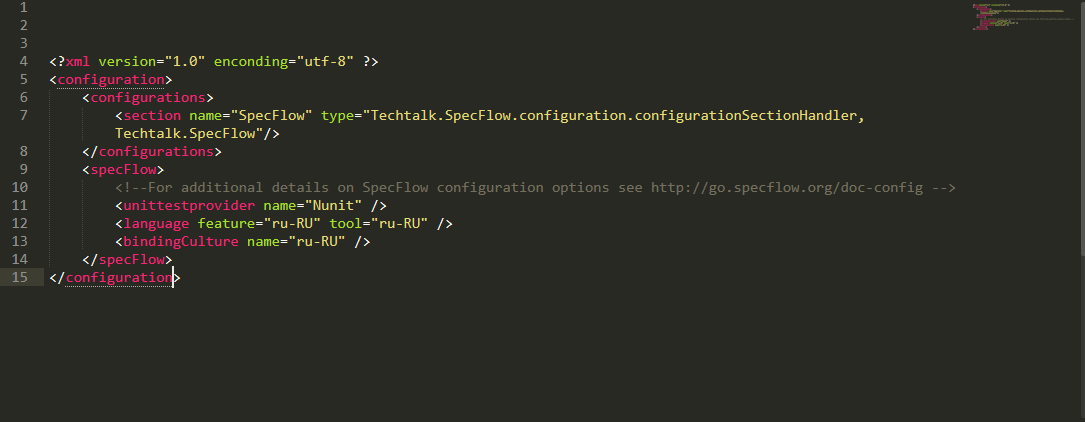
App.config File
Instead of NUnit in a given place, you can easily specify the classic test case runner.
This file is necessary for all the projects which contain the tests and feature documents, therefore, it is recommended to store keep its copies in a separate placeP.S. – The configuration documentation overwrites the standard SpecFlow settings, which means that when used on the English-language specifications, NUnit is not particularly needed.
Stage 3. Project Development
Now we start creating the project type (Unit Test).
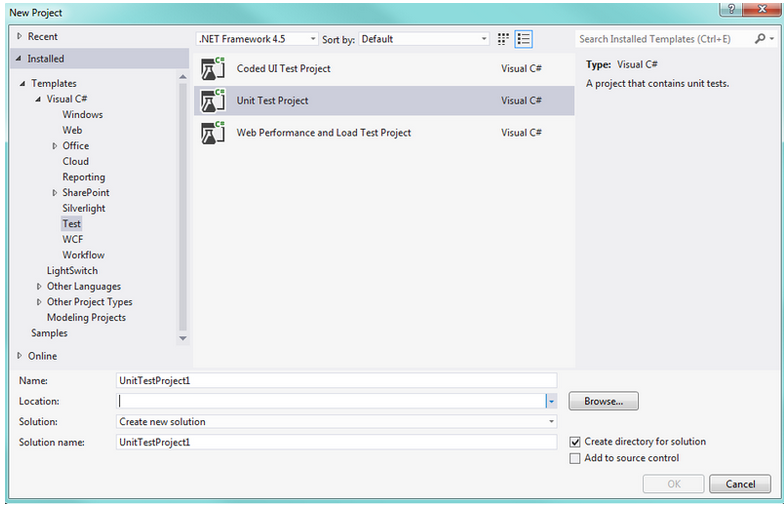
Creating the Project Type
After this, it is necessary to delete the unnecessary classic-type file from the project:
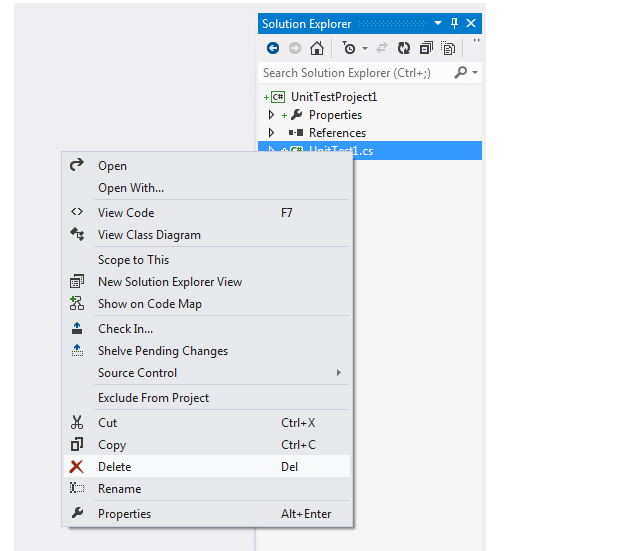
Deleting the Unnecessary File
Now it’s time to launch the package manager:
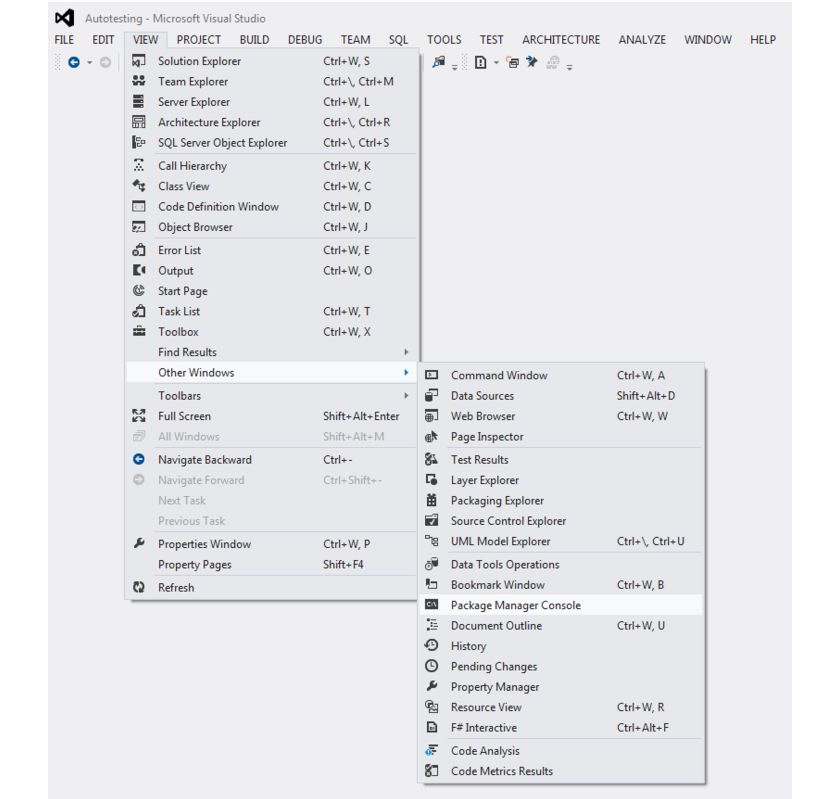
The Package Manager
Create a special command inside it:
A Special Command
In which:
UniTest Project1 is a personal name for your personalized test;
SpecFlow.Nunit is a special modification of Specflow for Nunit. You can simply record SpecFlow, when the tests will be run not in it but in the SpecRun, for example.
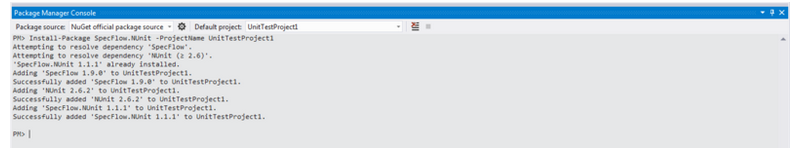
The Package Manager Console
As soon as the system processes the request, you will find the App.config document in the folder. By the way, it will not be found in the Solution Explorer.
Next, you will need to change the standard config to the one already prepared.This procedure can be executed in a couple of ways:
- By finding a folder inside the system of documents and change its content by a simple content change;
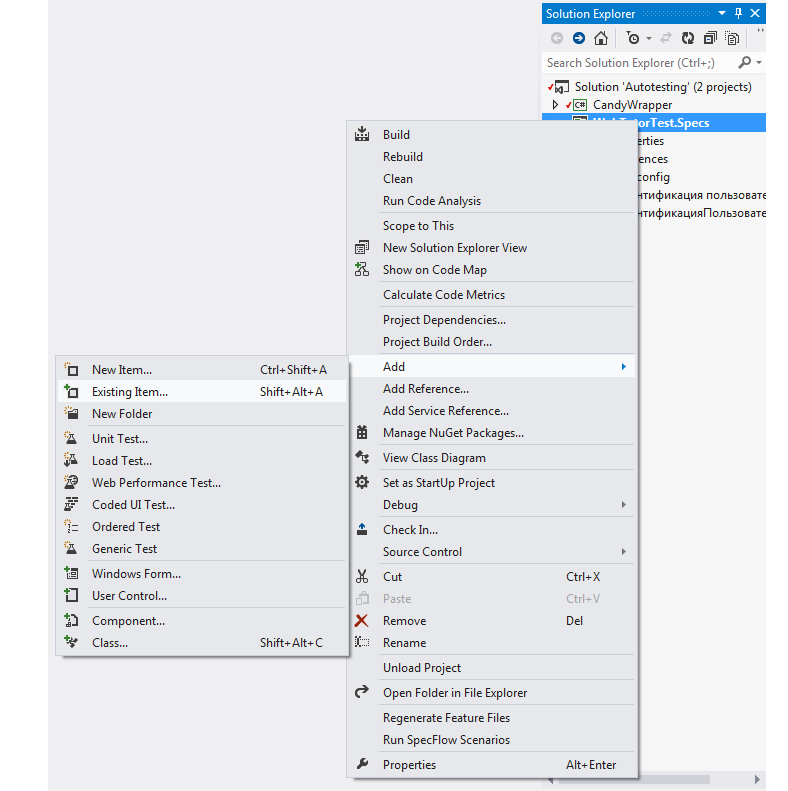
- By manually adding the document to the project tree:

Adding the Document to the Project Tree
Next, if you wish, you can start editing the content directly in Visual Studio:
Editing the Content in Visual Studio
After editing the configuration settings, SpecFlow will process the program features for the second time.
Stage 4. Adding a Document with Bug Identifying
Add the SpecFlow feature file to the project:
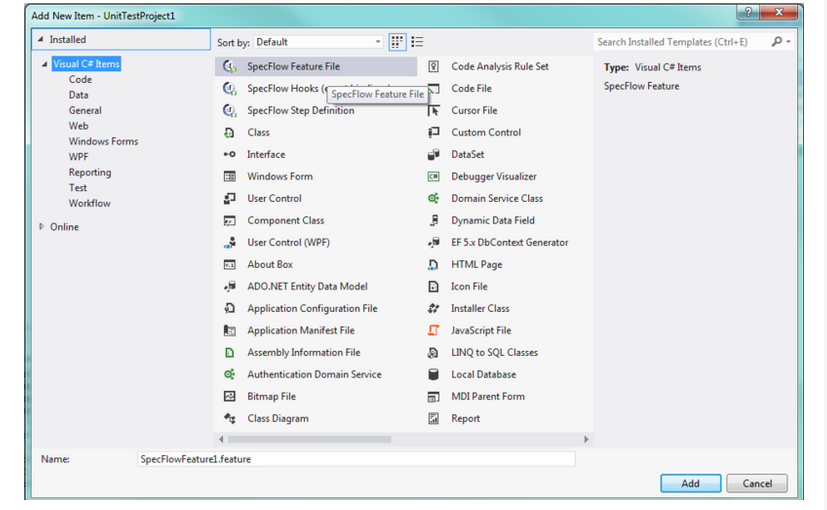
SpecFlow Feature File
The following document contains a special template in English. Since we plan to configure the SpecFlow exclusively for the Russian language, the highlighе of the program syntax will not be decrypted — the project is technically unable to recognize the traditional “Given / When / Then”.
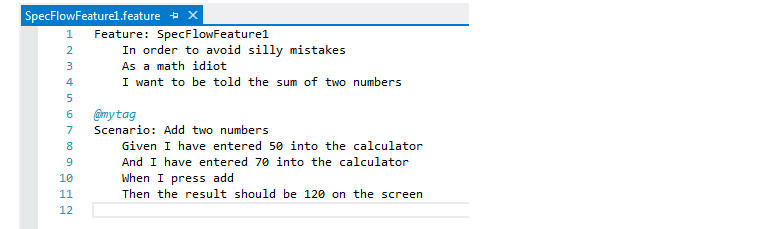
SpecFlow Feature File Template
The structure of the template can be easily changed as you wish.
Now it’s time to thoroughly describe the feature in Russian:

Describing the Feature in Russian
By the way, while describing you have to remember which keywords and phrases are used exclusively with the English version:
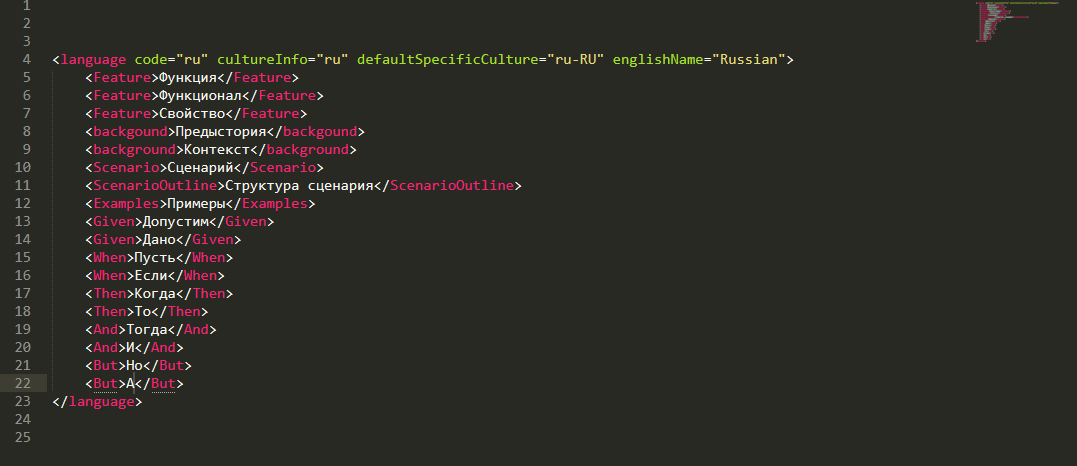
Keywords
Now you have every reason to see that the established configuration is successfully deployed and keywords in Russian are properly identified by the system:
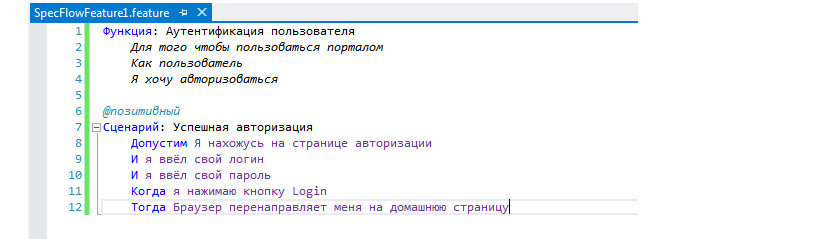
Keywords in Russian
Stage 5. The Process of Creating the Test Checks
Launch a special test phase processor from the system menu of the document:
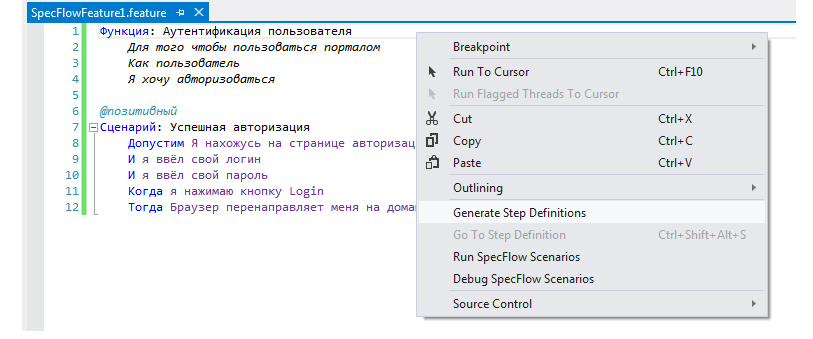
Test Phase Processor
If you have some doubts, you can re-check that everything functions properly and that the “If”, “And”, “After”, “Then” are found in the created case.
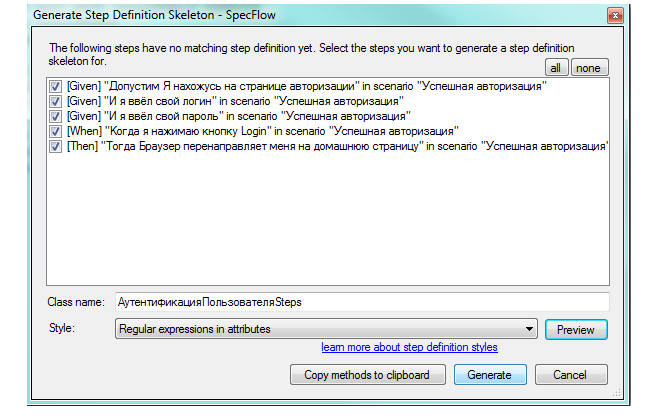
The Generate Button
The “Generate” button runs the necessary stages of generation.
It’s allowed to keep everything, as the system offers, or to rename it as you wish. Honestly speaking, it’s really good when all the files with the test steps are 100% identical to the feature documents by the name of the tested function, therefore it’s recommended to give the feature a proper name.
As a result, the following steps with a special “cups” for a program code of automated tests should be generated:
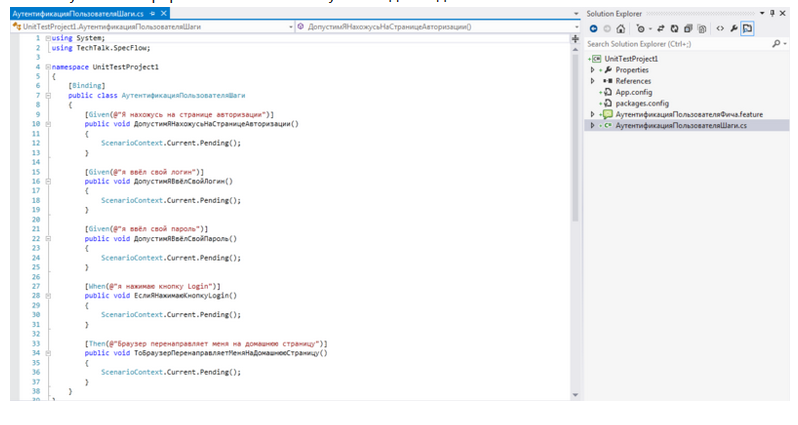
Steps with Special Cups
Stage 6 Running the Recorded Tests
And now, before starting the creation of an automated test, you can run a manual test and make sure that everything functions as properly as possible.
It is most convenient to perform this work directly using the context menu inside the feature document:
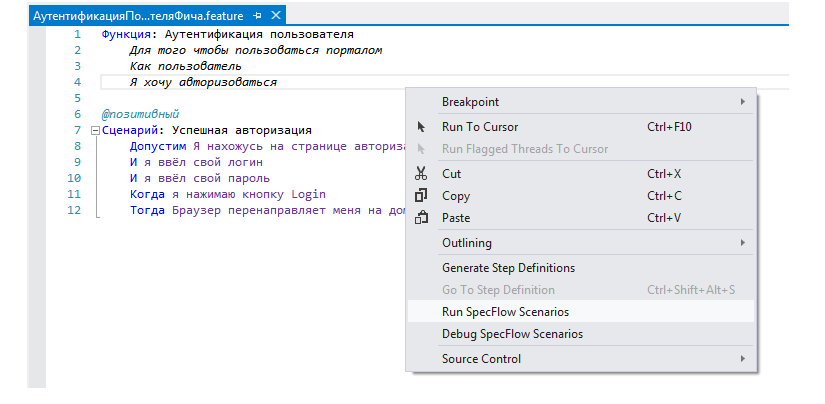
The Context Menu
If all the parameters are set correctly and the test is recognized by the system as unfinished, then its start does not occur:
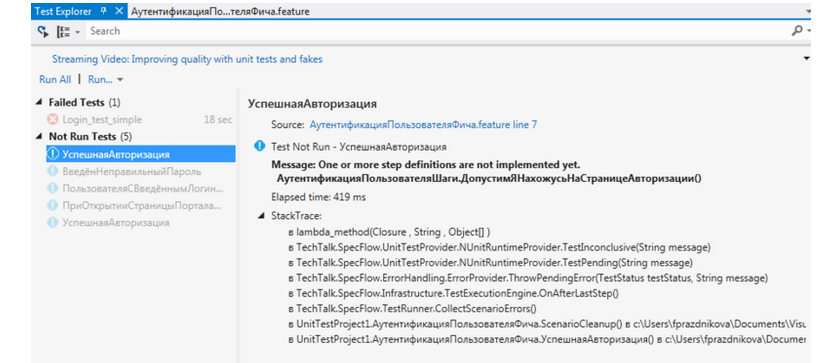
Failure in the Test Start
The image shows the failed checks. Nunit begins to work with all the checks for the second time.
If certain tests function incorrectly in the system, then the test will be definitely not performed before the start of working on automated tests. In the worst case, Nunit automatically decides that no checks were created at all.
The Final Advice
And then you can “adjust” new scripts to existing automated tests as you wish and therefore significantly increase the number of available feature files and test scripts.


Leave A Comment