
In this article, we will explore the practical side of managing the testing process on the basis of the TestRail tool: we will analyze its practical usage and main features.
So, with the help of TestRail, you can get total control of test cases on some projects, along with various practices and testing methodologies, as well as functions optimized for the software testing.
Specialists use this tool for both Agile Development and Testing Methodology. However, TestRail flexibility allows using it at any type of testing process.
TestRail logo
TestRail Functionality
Main features of this product are the following:
- Document test cases with screenshots and additional descriptions;
- Organize test cases into test suits;
- Distribute test cases to project team;
- Assign test cases and manage team workloads;
- Review the results of the test run;
- Generate reports on the most used metrics.
This program supports different kinds of testing. It can be used for manual and script testing, organization of exploratory testing, and for potential integration with certain automated testing tools.
TestRail has an open API. Hence, users can create their own custom integrations by themselves. This flexibility makes the TestRail a high demanded tool for test case management.
Also, it is worth noting, that there is an easy user interface that helps to quickly understand the main product features and not to waste precious time for training. Moreover, TestRail functionality has special advanced capabilities, such as customizable reports.
Further, we will analyze the TestRail usage on the basis of a test example with a daily testing process, the number of the passed test cases, and the failed ones.
At the top of the screen, you see Test Runs and Milestones. A test run is used to group test cases before their execution. Whereas, milestones shows a number of tests for specific purposes (for example, for the final software release).
TestRail Walkthrough
If you want to try all the product functionalities and download a demo version of the program, follow this link.
So, you can choose a cloud version for instant setup, or a Server version to install on your own computer.
First of all, you need to fill in the required fields as shown below.
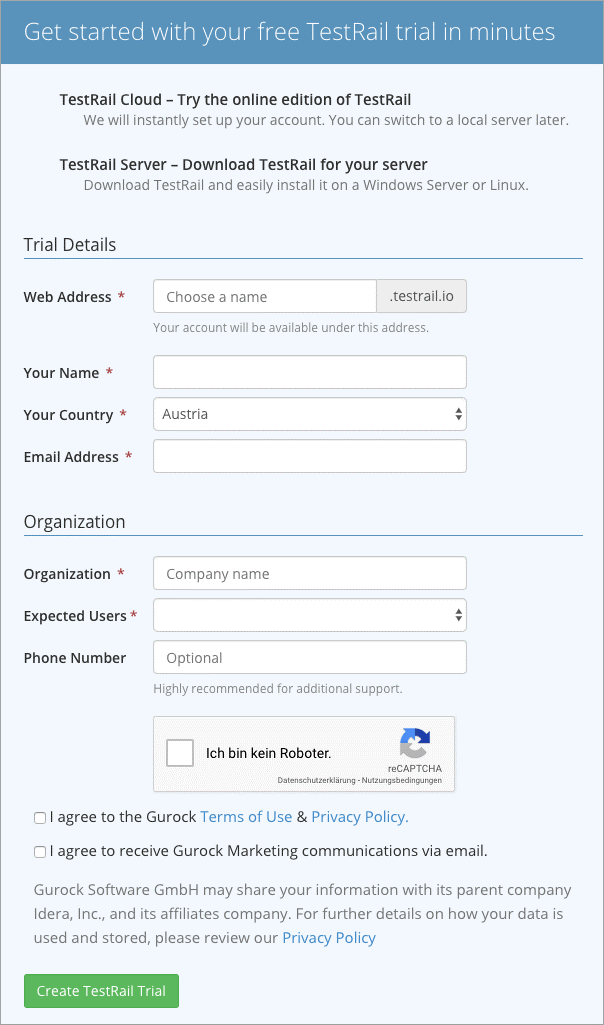
Demo version of TestRail
When the registration is complete, a new user receives an email with a link to confirm the free trial. After clicking the link, the user can work with the demo version of TestRail.
Important! Depending on your location, you may need to sign a Data Processing Agreement to confirm compliance with the General Data Protection Regulation (GDPR).
After this, the setup of the TestRail account is complete.
Getting Started
The screen that the user sees when he/she opens the program is the TestRail Dashboard.
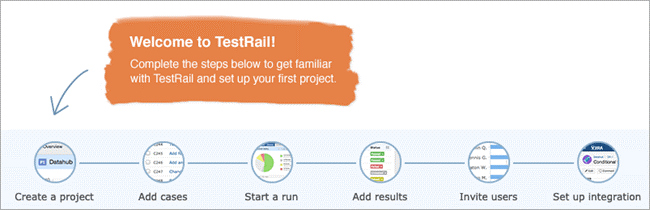
TestRail Dashboard
At first, you have to click on the Administration tab. It is needed to add users and roles, to extend the trial subscription, to set up custom fields, to set the integration and others.
If you click the Users and Roles, you’ll see that you are the administrator of the project.
After clicking on the Roles tab, you’ll see the list of roles on the project – Read-only, Tester, Designer, and Lead.
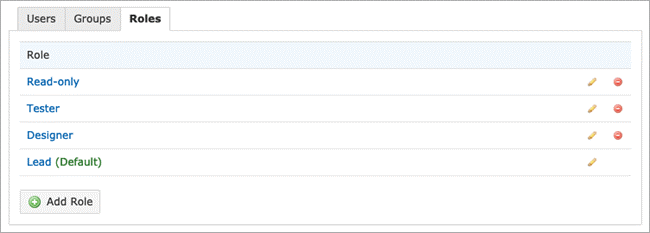
List of roles
If you click on the pencil icon, you’ll see the rights for each role. The administrator can change the description here, create additional test assignments, add or delete some users from the project, organize groups, etc.
The Dashboard tab allows opening the tools list for tracking and managing the tests.
New project creating
Creating a New Project
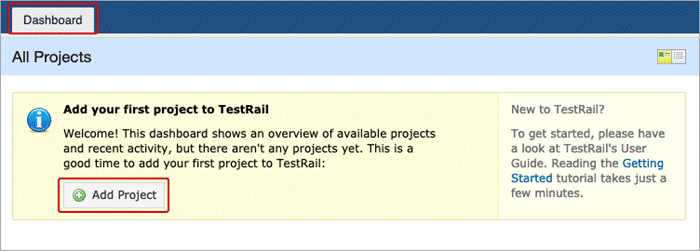
To add a new project, you have to click on the Add Project button. Then, enter a new project’s name, choose the option for its saving (it is recommended to choose multiple test suites to manage cases).
This option allows starting the project with one test suite, and then add other ones, if required.
Click on the Add Project button.
You will see the dashboard with the new project. Here you can change the project’s name or delete it later.
The screenshot below shows the dashboard, for example, a project with several test suites and another project with one repository.
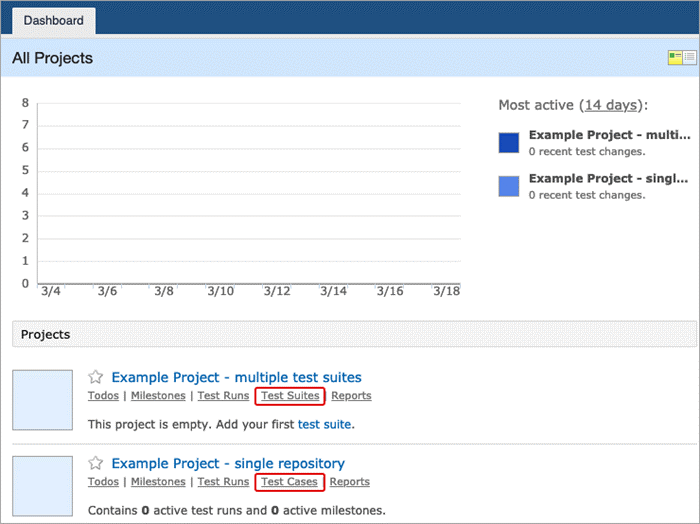
Dashboard with few test cases
Click on the Test Suites tab. As it’s the new project, there should be a test suite named Master. You just need to click on the suite’s name for editing its sections and test cases.
Or you can click on the Add Test Suite button, and try to add a new test suite to your project as it’s shown on the screenshot below.
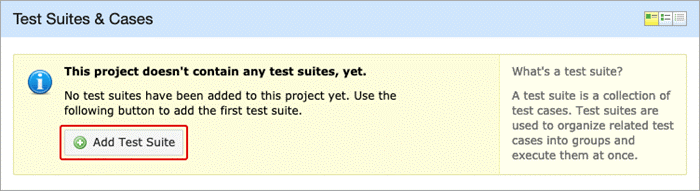
Creating a new test suite
Creating a New Test Case
Now you can add a new test case. Once this message appears (see below), just click on the Add Test Case button.
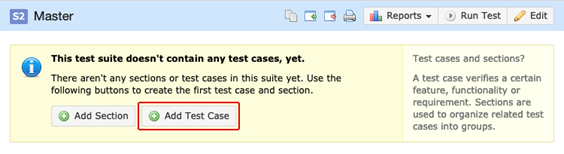
Creating a new test case
After this, you will see a detailed test case view, as shown below. For example, let’s add a simple test named “Login”.
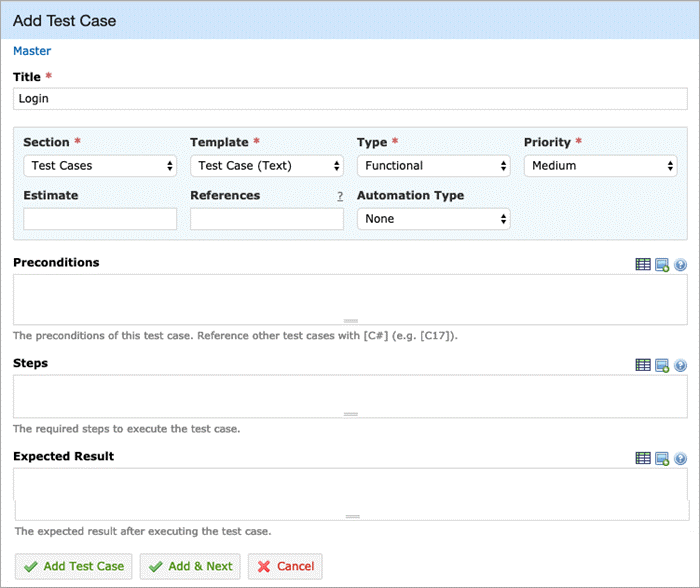
Fieling the fields
The following 4 fields are required. You can use them to sort or filter test cases: Section, Template, Type, and Priority.
- Section defaults to Test Cases. This section is created automatically for every new project.
- Template defaults to Test Case (Text). TestRail has 3 built-in test templates:
• Test Case (Text). It includes text fields for preconditions, stages of testing, and expected results. You can add screenshots to these text fields.
• Test Case (Steps). It includes a text field for preconditions, rows for separate test steps with the expected results for each of them. You can add a screenshot to each step.
• Exploratory Session. It includes text fields for the mission and purposes of the evaluation session. - You can choose a Type of test, for example, regression, functional, performance, or automation.
- Set a Priority, for example, High, Medium, or Low.
Now you can run a test with added preconditions, steps, and expected results. After the test is complete, tap on the Add Case button. There will be a short description of the test case, as shown below:

Short description of the test case
You can add several more test cases.
For this, click on the Test Cases link and the Test Cases menu will be open. You just need to enter the original names of tests.
Important!
Users can import test cases from the CSV or XML files.When test cases are created, you can proceed with the test run. This is a test suite that can be used for some goals, such as regression testing, smoke tests, testing of new features, risk-based testing and so on.
If you are asked to select a test suite, choose “Master,” and then click OK.
After tests are successfully saved, you can see the easily customizable reports in the TestRail.
The screenshot below shows the reports which are available during the testing of the particular project. By the way, the list of additional reports is available in the special Reports tab.
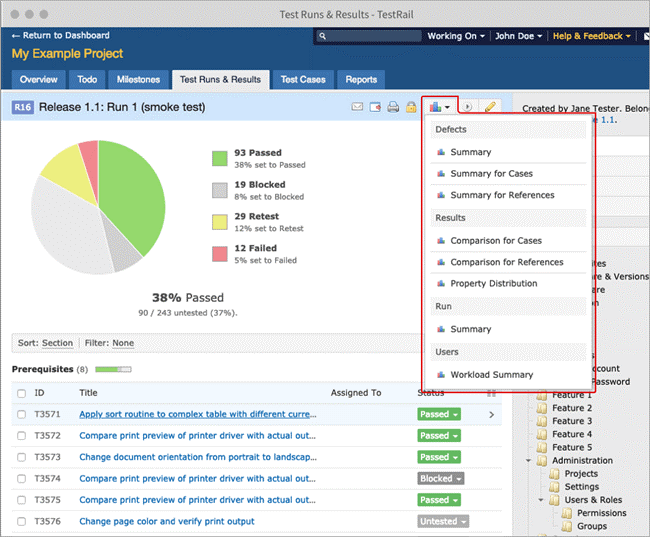
Test reports
Peculiarities of the Milestone Setup
Despite the fact that it’s not necessary to set milestones for a test run, it’s a good practice. They help to track the progress across several test case lifecycles.
So, to add milestones, you have to click on the tab with the same name.
Once all tests are completed in the test mode, you can block the cycle, and thus it will prevent future changes. It means, even if test case changes for a future cycle, its definition is saved for the current run, in case you should audit the test results after a while.
Conclusion
No doubt, TestRail usage significantly improves the general productivity of the testing team during the independent testing.
TestRail is a good and practical alternative to out-of-date tables and text files, where you can easily and quickly track all the steps of web product testing.


Leave A Comment