Today web accessibility usually means nominal easiness to use websites and their perception by people that have some vision, hearing, cognitive or physiological problems.
And have you heard that there are special guidelines for web accessibility for web portals?
They are called “WCAG” and have been developed by Web Accessibility.
When you see them for the first time, they may seem quite complex since there are a lot of them.
But don’t be desperate — it’s not hard to start web accessibility testing.
This article contains the main details of how to test web accessibility correctly and make useful fixes to make the application you are testing completely accessible and relevant.
The Wave Tool
A very easy method to perform accessibility testing is to use the WAVE tool.
This extension is available for Chrome, Firefox, and Microsoft Edge.
To install it, you need to visit this page: https://wave.webaim.org/extension/ and select a web browser you are using.
When the installation is finished, it will become active in the user browser’s toolbar.
The WAVE Tool
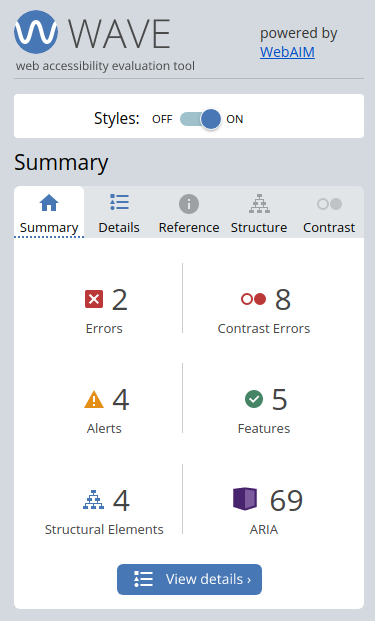
To use the extension, you need to visit the page you are testing and click on the extension to activate it.
Next, you will see a list of errors and potential fixes that should be analyzed by you to make the page you are testing completely meet web accessibility standards.
When you click on the icon, you will find additional information about the guideline, get the link to the WCAG manual and also the link that will direct you to the HTML code structure.
Using the WAVE Tool
Web accessibility bug fixing is also not a hard task.
Example of working with WAVE. Fixing some HTML errors
When a product is used by a user that has vision impairment, he/she uses special software that helps him/her read info from a screen.
This software can tell what elements are on a page and where they are located.
And if the page contains an image without alt text, software can’t read it.
In this case, it’s needed to add alt text that contains the image description.
A small example of such an image without alt text:
<img src=”/img/Logo.png”>
Here is an example of an image with alt text:
<img src=”/img/Logo.png” alt=”logo”>
When a user uses a reader to complete a web form, he/she needs to understand what is the purpose of input fields.
It’s not enough to have a label only: the “for” parameter makes any field completely clear.
Here is a small example of an input field with a label without the “for” configuration:
<label>Email</label>
<input id=”email” placeholder=”Email”>
And here is an example of how it looks like with the “for” parameters:
<label for=”email address”>Email</label>
<input id=”email” placeholder=”Email”>
These simple fixes don’t affect the way web pages are displayed but will be very helpful for the ones who use screen readers.
Conclusion
This software is popular everywhere, so you need to check the standards of websites inside certain usability testing companies thoroughly and in complete accordance with common standards of web quality assurance.


Leave A Comment