
Test Studio Overview
Telerik Test Studio is an automated functional testing solution for regression, functional, load and API testing automation.
Unlike several other testing solutions that impose their own proprietary language, Telerik Test Studio uses C# or VB.Net language. Use of a real coding language means it’s easier to find support online. Test scripts can also be shared via source control with the team.
Telerik is an icon-based tool that automates functional or regression testing of any web or desktop application. Even a tester with low or no coding knowledge can also use Telerik. It can be used for both record and playback and descriptive scripting, which is the most important in terms of team collaboration. Testers can either write scripts or can simply use the extensive record and playback feature offered by Telerik.
Advantages of Telerik Test Studio:
• It uses the active screen for recording which means, the tester can refer to the screen while recording the scripts.
• Telerik utilizes DOM structure of the webpage for identifying object properties.
• Telerik Test Studio is also able to interact with any file-based source control system and integrates directly with Team Foundation Server (TFS) and Git.
• Test Script maintenance is quite easy and any changes in the scripts can be easily incorporated.
• Extensive reporting.
• Offers integration with Visual Studio.
• Remote execution and test scheduling.
Disadvantages of Telerik Test Studio:
• It comes with a licensing cost. See: Telerik Test Studio pricing.
• Online support is available with license renewal.
• Using relative object properties can be challenging.
• Need to setup add-in for source control.
As a free-of-charge alternative for Telerik Test Studio, one can use Telerik Test Framework. This framework is used by Test Studio internally and allows to create automated tests in code only, hence one must have coding expertise. For this tutorial we will focus only on features provided by Telerik Test Studio.
Setup walkthrough
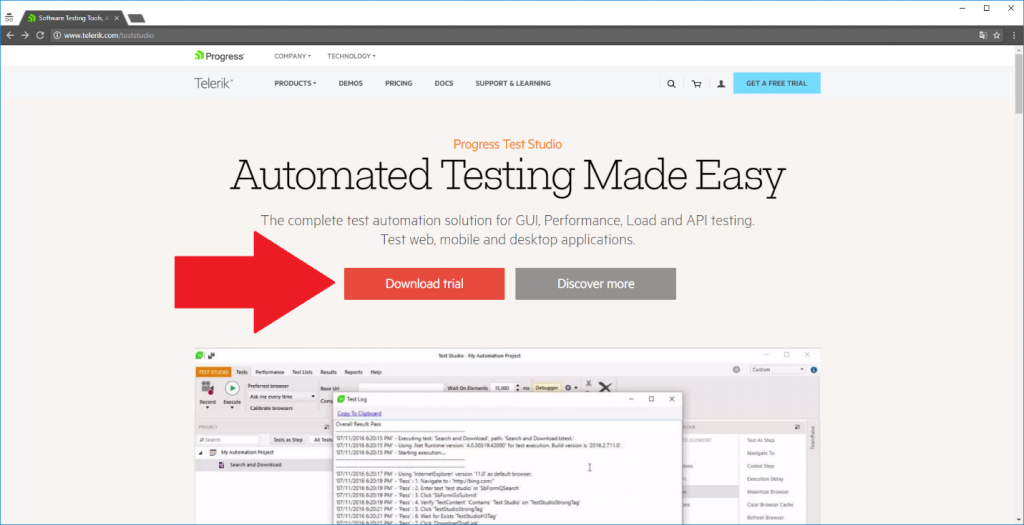
Step 1. Navigate to Progress Telerik Test Studio page and click “Download trial” button.
Step 2. You will be redirected to download page and download should start automatically.
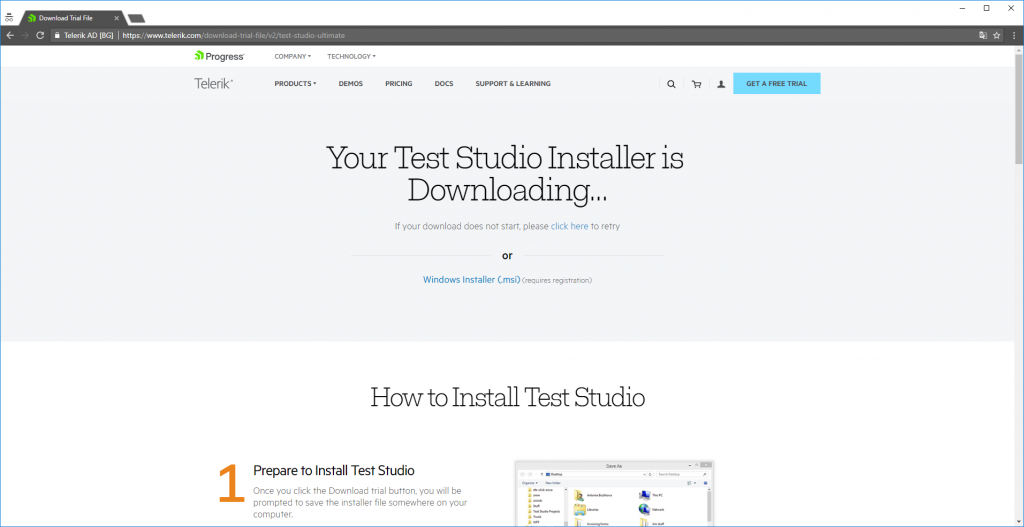
Once it completed, follow the installation steps described on download page:

You will be asked to provide your Telerik account information in order to install Test Studio on your machine. In case you don’t have one, you can sign up within installer.
Now, when you have Telerik Test Studio in place, we can start with our first test.
Test recording
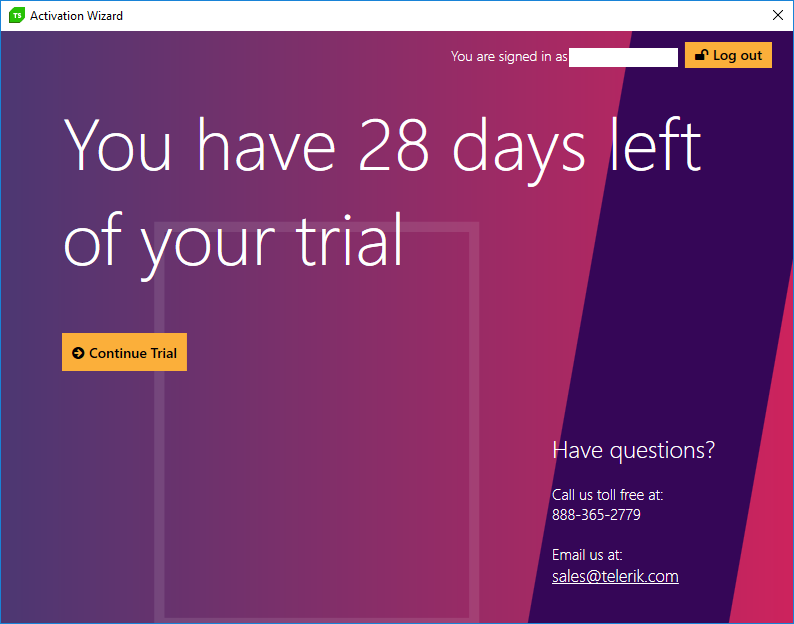
Step 1. Open up Telerik Test Studio. You will be greeted by “Activation Wizard” window, which displays how many days have left before trial expiration. Click “Start Trial” button (or “Continue Trial”, if you’ve opened Test Studio before).
Step 2. Click “Create project” at the left side menu, then choose “Web & Desktop” option
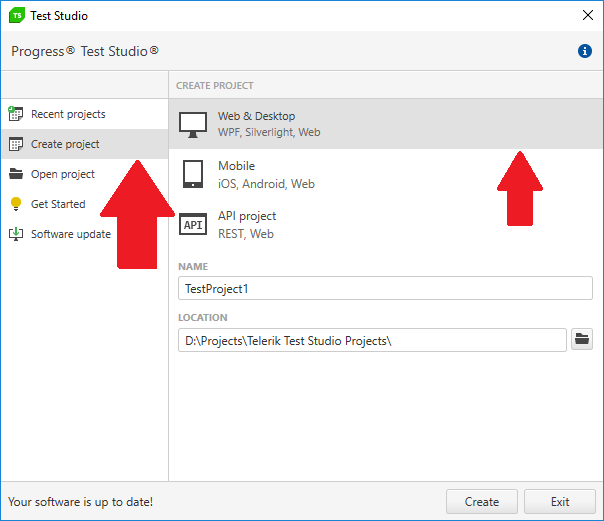
Step 3. Specify project’s name and location and click “Create” button.
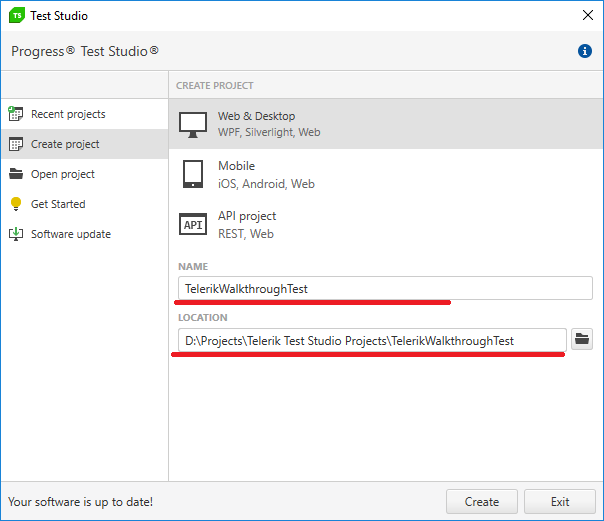
You should see this window:

Now, we have an empty project. Let’s add some tests to it.
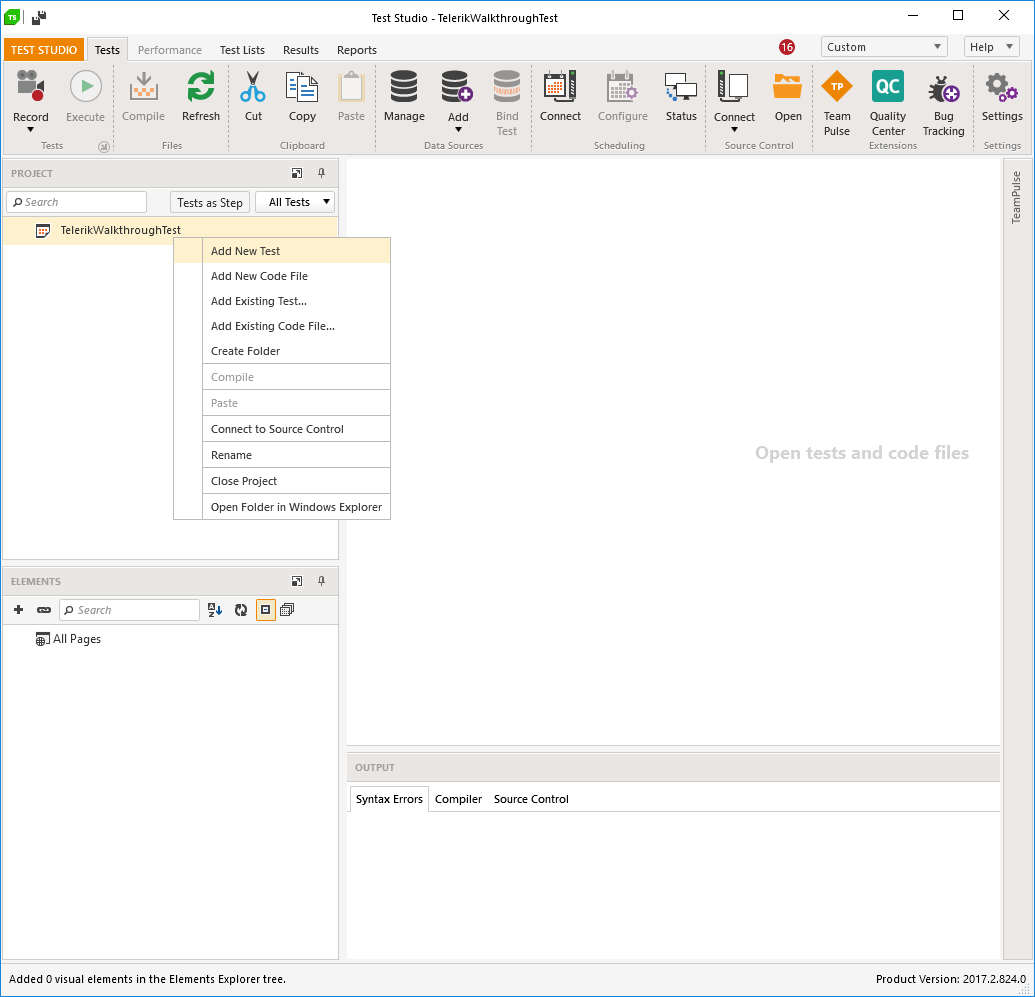
Step 4. Right-click your project item at the left side menu and choose “Add New Test” from drop-down menu.
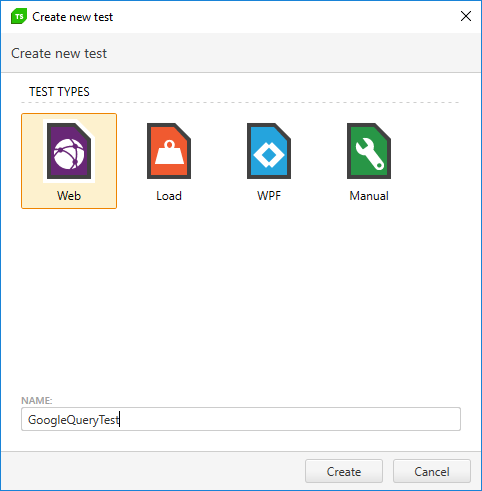
Step 5. In appeared window choose “Web Test” option and enter “GoogleQueryTest” as test name, then click “Create”.
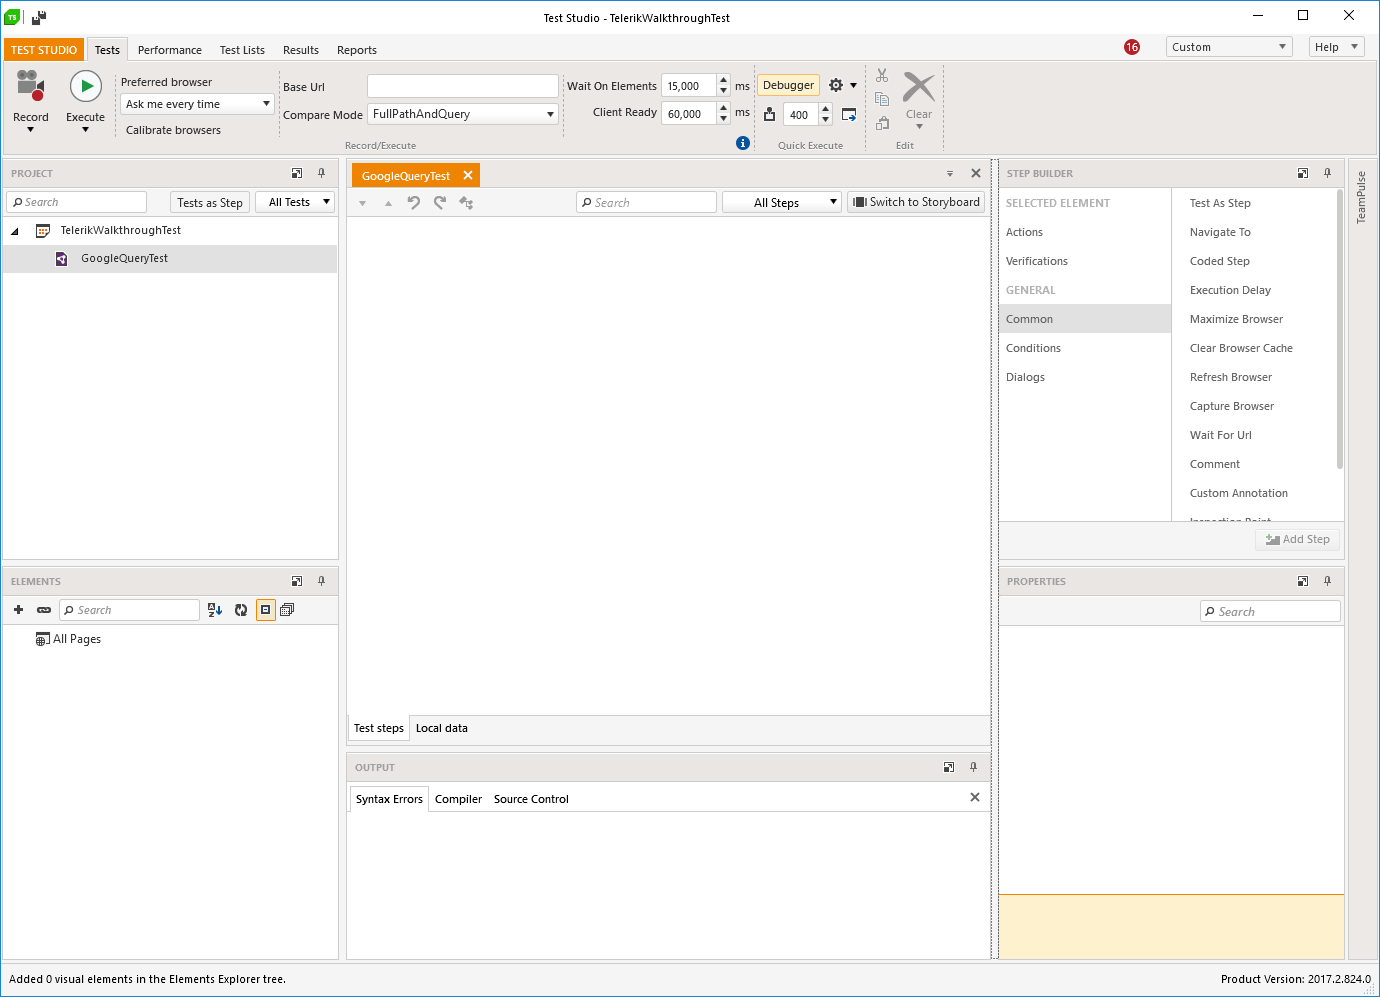
You should see newly created test under your project:

Step 6. Double-click “GoogleQueryTest”. You can see that test consists of items called “Test Steps”. They are basically commands that interact with the page and perform needed actions for test execution. Also, such steps can be some kind of logical conditions (if…else statements, while loop), execution delays or even commands to execute another test. You can add one manually, but for now we will focus on automated test recording.
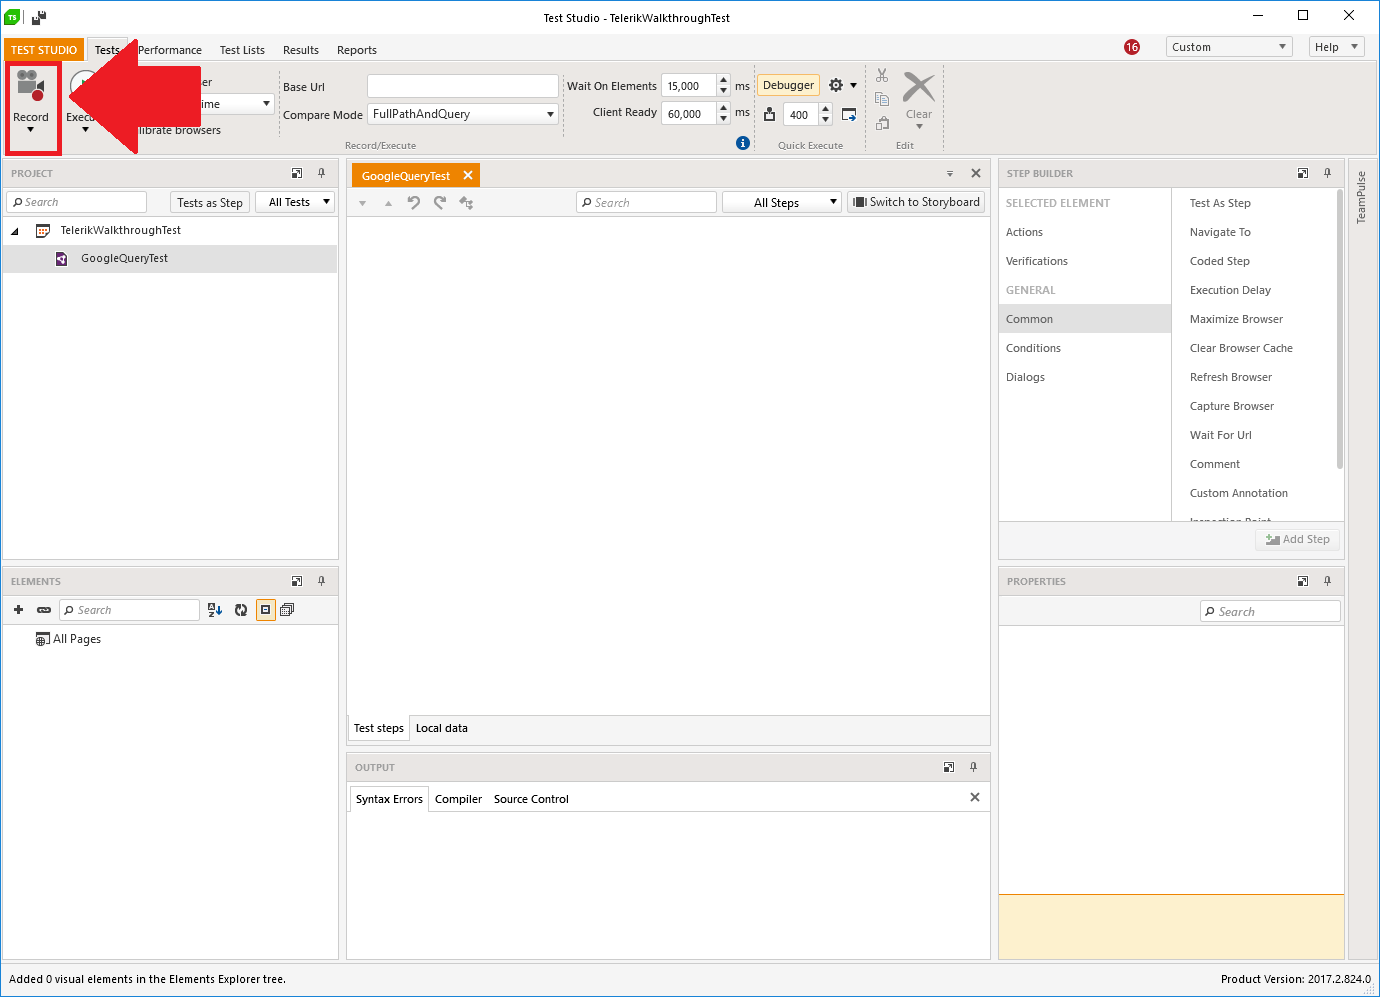
Step 7. Click “Record” button
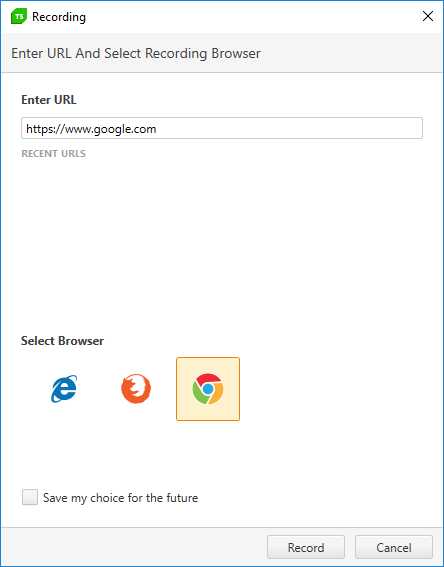
Step 8. In “Recording” window enter URL: https://www.google.com and click your browser of choice to record in. Then click “Record” button.
NOTE: if you’ve chosen “Google Chrome” as desired browser, Test Studio will need to close currently running instances of Chrome and ask you, if you agree with that. After that, you will need to install additional Chrome extensions. Browser page with recorder initializer will guide you with that. You can install them manually by following this Test Studio documentation before starting recording.
After you’ve installed all extensions necessary, you will be navigated to requested URL and should see this:

At the bottom you can see recorder window and its options. We will look at them later, but for now just type “Telerik Test Studio” in search field, press “Enter” and after results page has loaded, close the browser to stop recording.
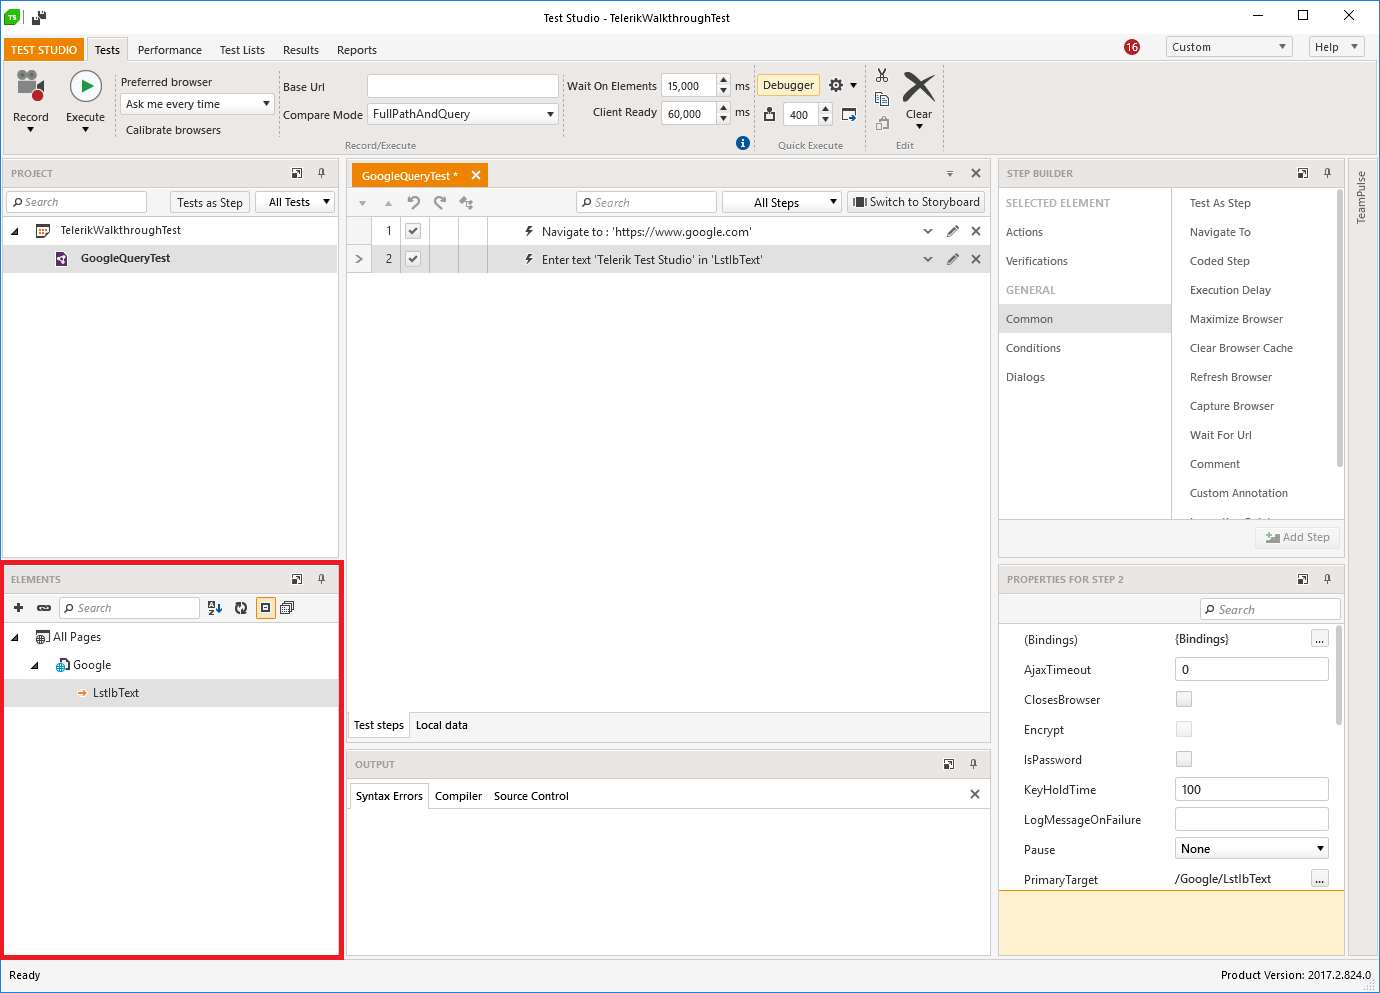
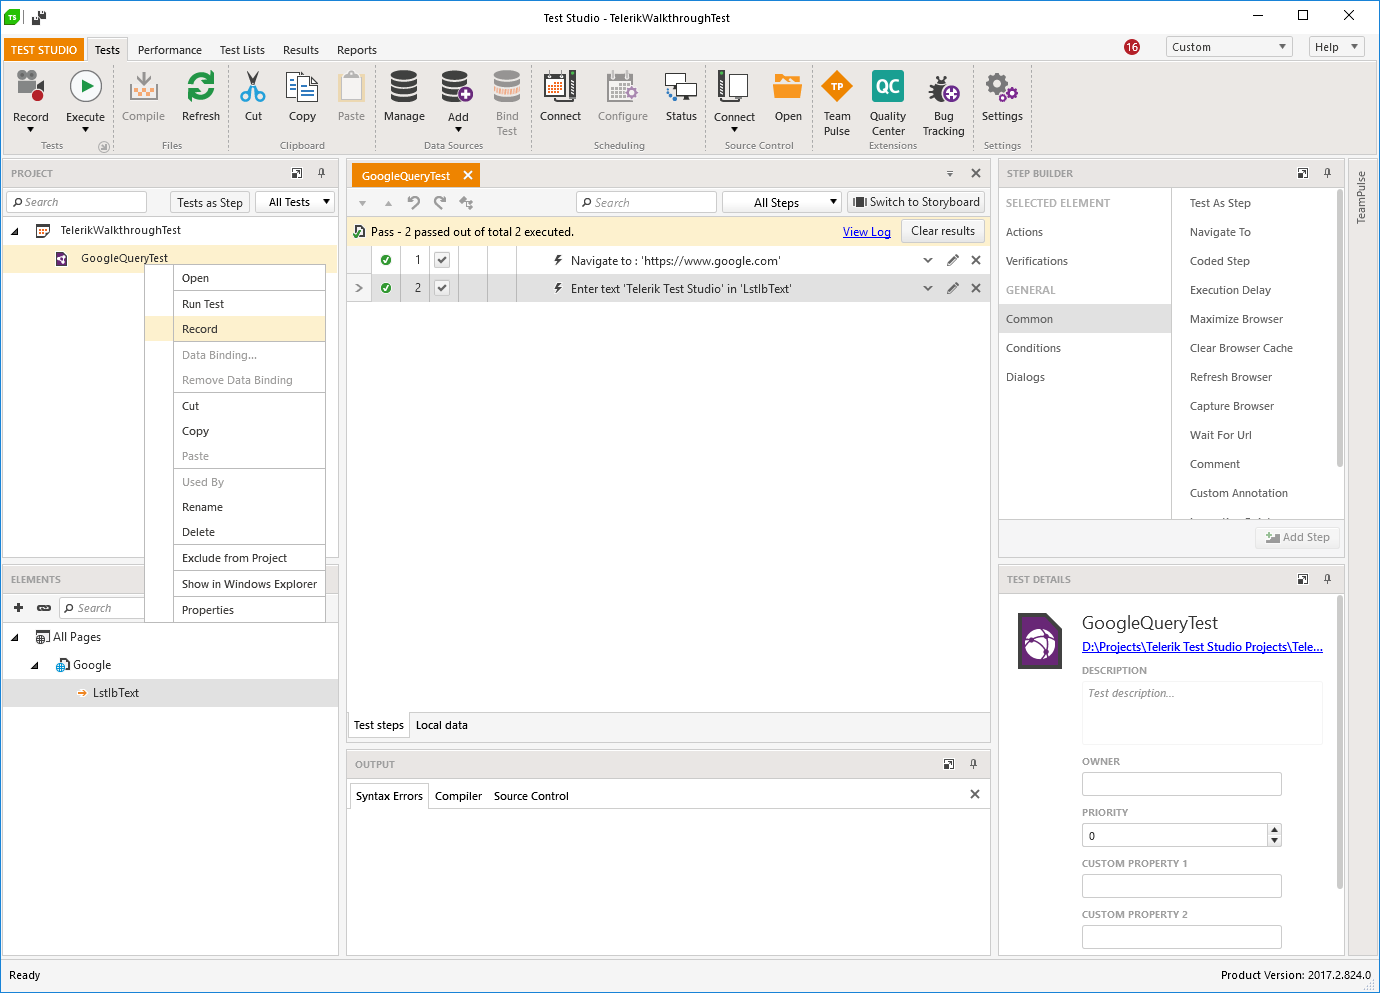
Step 9. Now, come back to Test Studio. You can see that recorder added test steps to our test.

Also, there is auto-generated elements for google.com page in the left bottom corner. They are generated by Test Studio with Page Object pattern in mind to allow reuse of elements of the page in different tests.
Let’s run our test right now. Click “Execute” button.

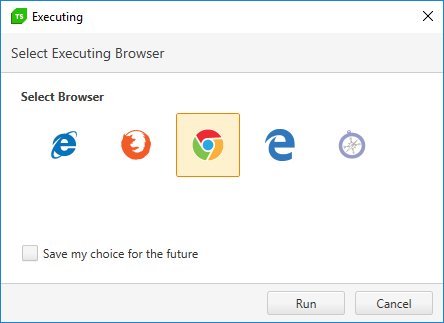
In “Executing” window choose a desired browser and click “Run”.
As you can see, our script navigates to specified page and inputs desired query, but it doesn’t search for it and closes browser window almost instantly. If we look at our scripts test steps closely, we can see that our steps do exactly that. That means that recorder didn’t work well and missed a few steps. So let’s modify our script and add some assertions as well.
Step 10. Right click our test and choose “Record”. Choose the browser to record in.
Step 11. When it comes to script editing and additional recording, it depends on situation, which steps in particular you should modify. For this script follow such workflow:
navigate to www.google.com;
click input field for query;
type “Telerik Test Studio”;
press “ESC” key while focusing input field;
click “Google Search” button;
leave browser window opened for later use.
Step 12. Switch back to Test Studio. In your test you should see this:
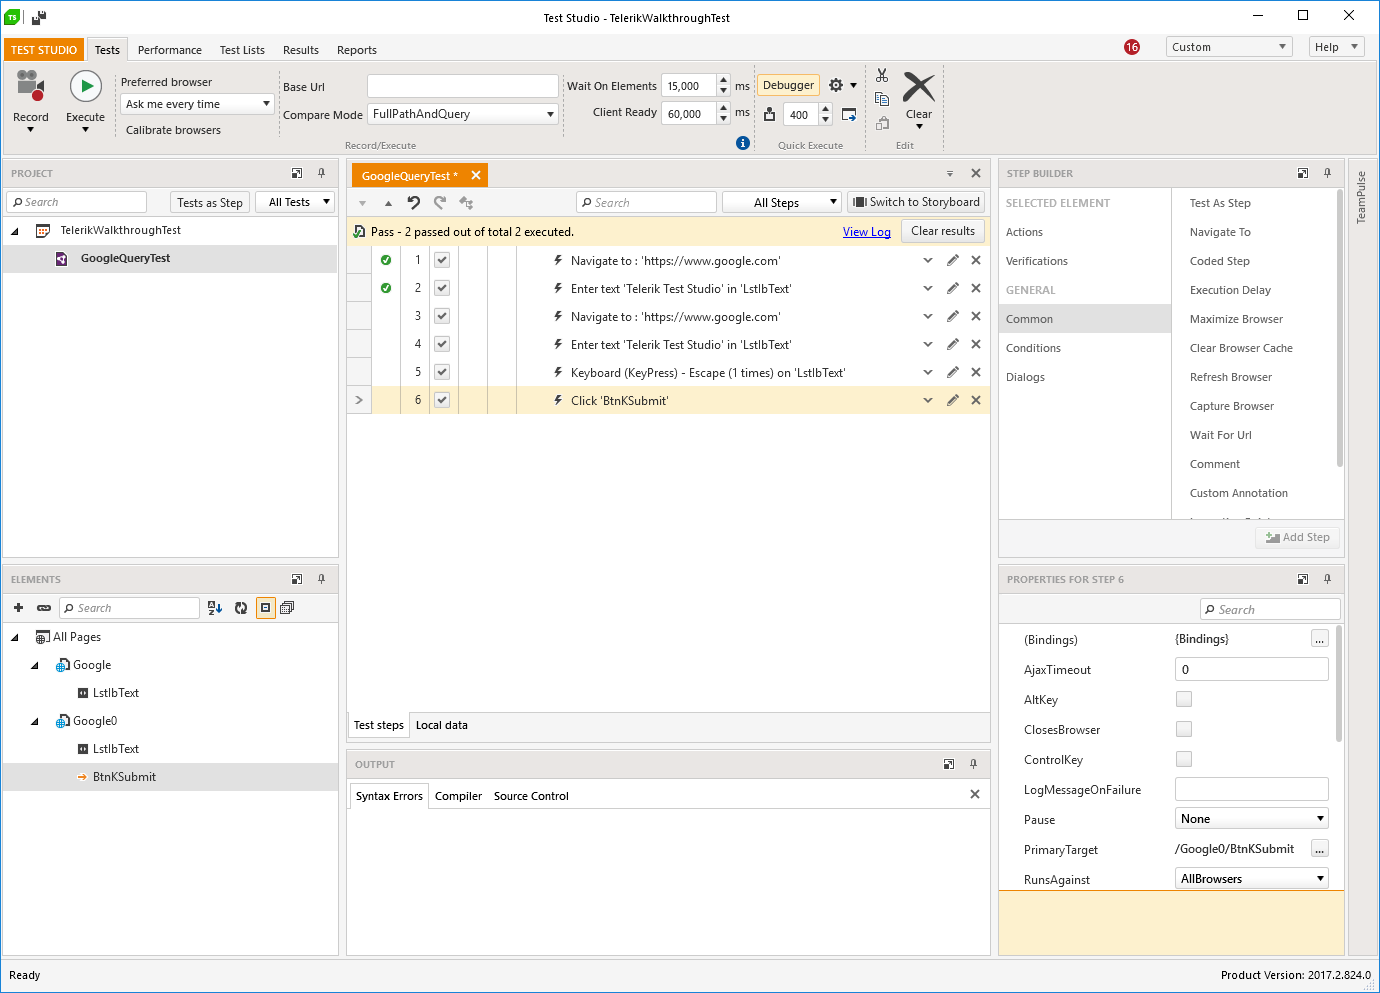
As we can see, new recorder session has appended test steps to the end of this test. Also, there is duplicating steps as well, i.e. “navigate to”/ “enter text”. We will take care of them later.
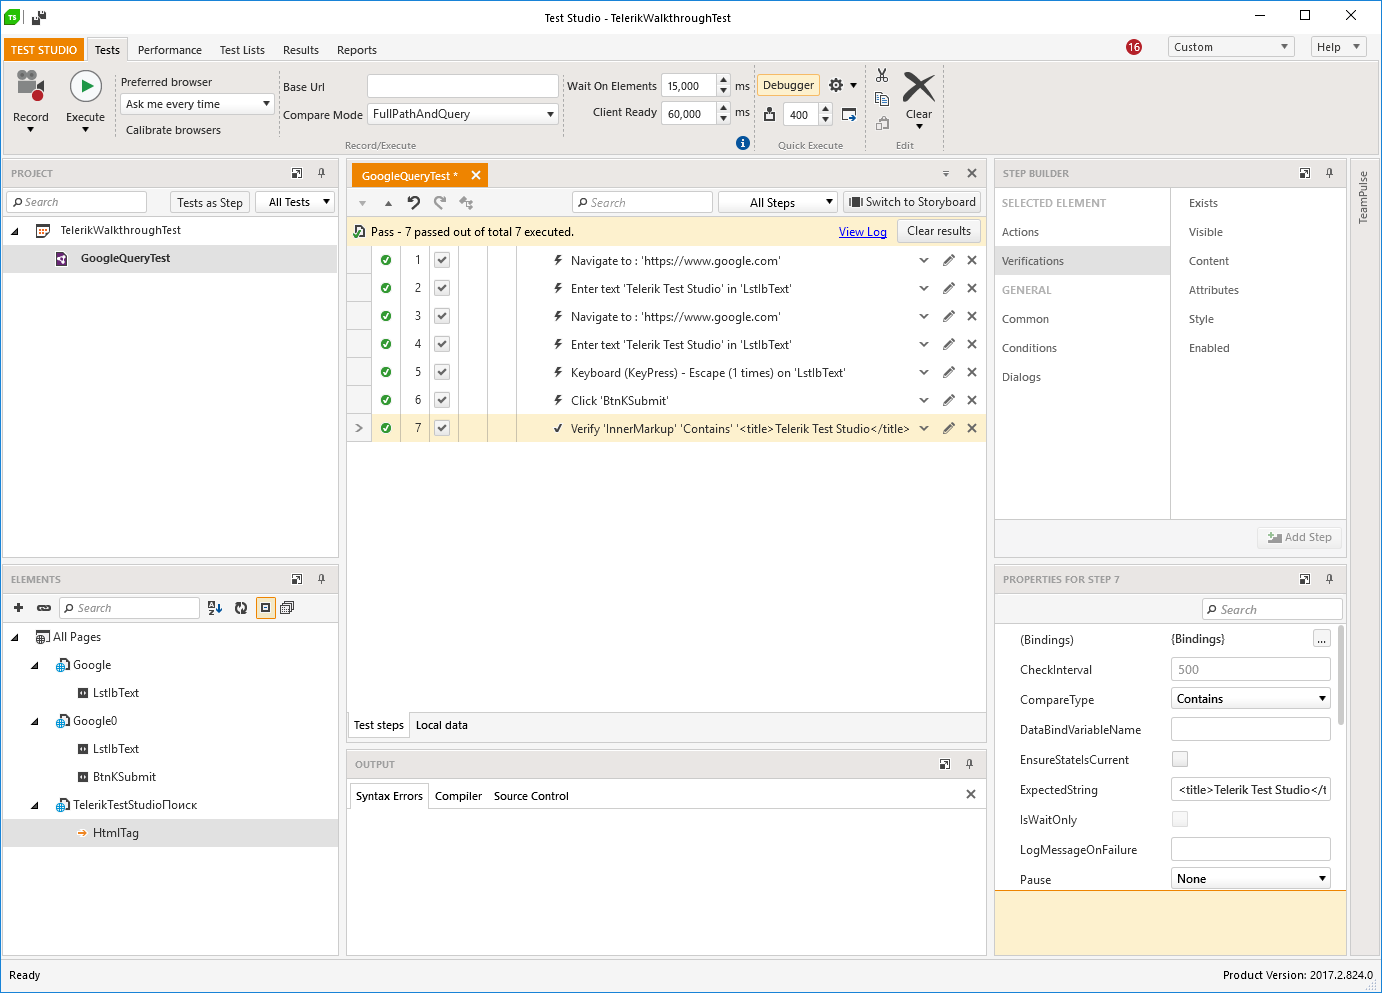
Step 13. Let’s add some assertions to assure that correct search page was loaded. Switch back to browser with recorder. In recorder, at “Verifications” panel, click “Content”.

Here, at “Content”, choose “InnerMarkup” as field we are checking, then function “Contains” (or “Exact” if it suits your needs) as logic rule for check and type the value we are expecting. Let’s make it simple and type “Telerik Test Studio”. This means that test will succeed only if page source contains the following sequence. And it should, since this sequence is referring totag of the page.
Later, we will move this assert to so called coded step, but for now we will stick to that.

Finally, click “Add step” and close browser window.
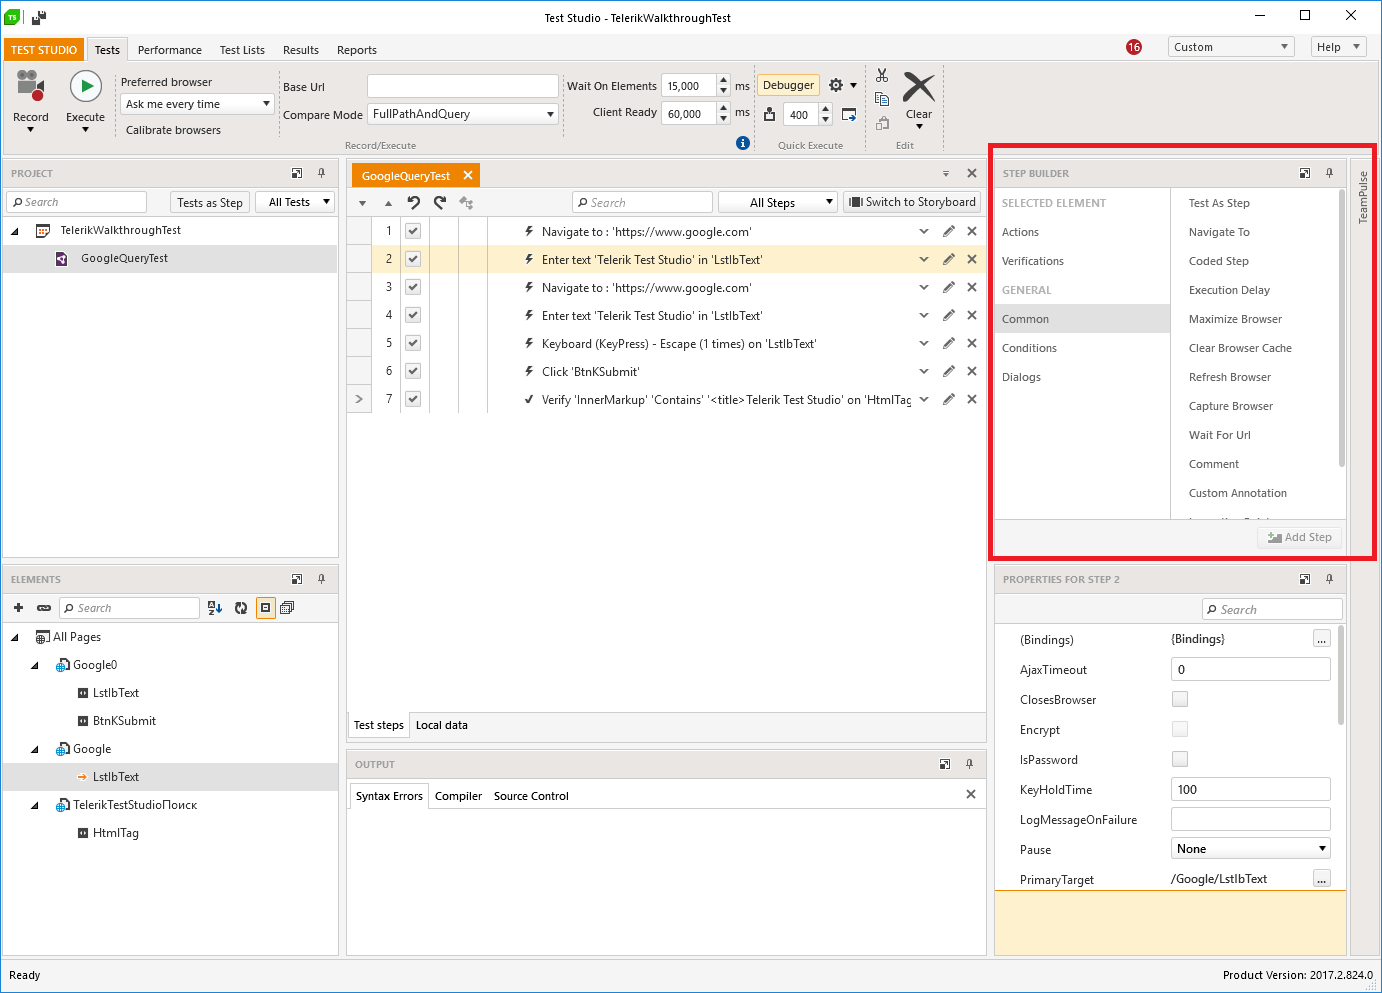
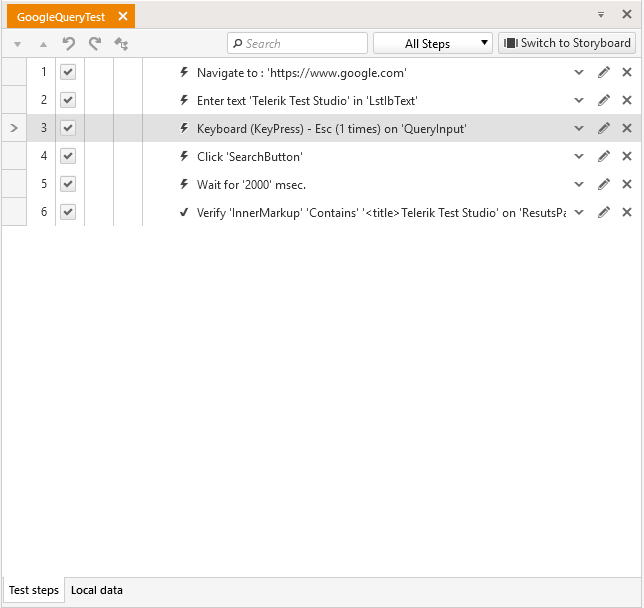
Step 14. Back in the Test Studio take a look at our test steps. You should see something similar:
Now we need to modify our test steps in order to make our test more reliable. By default, Test Studio doesn’t simulate real typing or real clicking when executing scripts. This mean that it won’t trigger any scripts that are waiting on page for typing or clicking. Sometimes, this might be an issue. So:
Click first “Enter text” command.
In “Properties” panel make sure to check “SimulateRealTyping” checkbox.
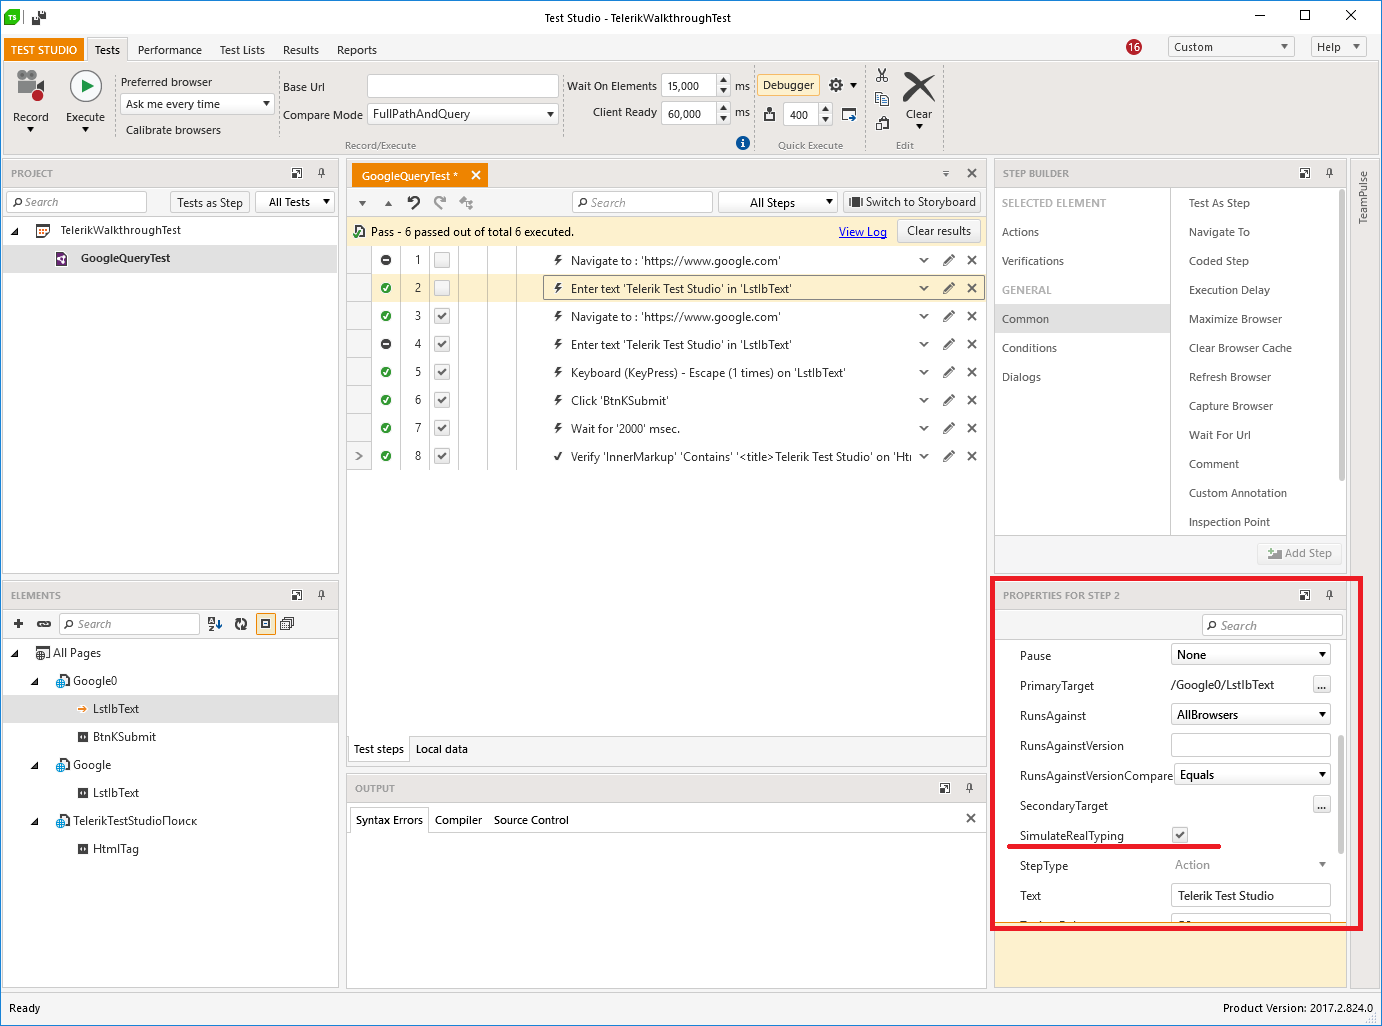
Secondly, important thing to note that our “Verify” action is performed instantly, before actual results page are even loaded. Thus, it will fail, because we are verifying that somewhere in current page exists line sequence “Telerik Test Studio”, and by the time of “Verify” test step execution there is no such sequence. In order to keep things simple, we will put so called Execution Delay before our “Verify” action, thus allowing results page to load. This is a bad practice for numerous reasons and we will replace this with proper operation later on. For now, take a look at “Step Builder”.
Here, we want to choose “Common” item, and then “Execution Delay”. After that, click “Add Step” button.Here is the result.
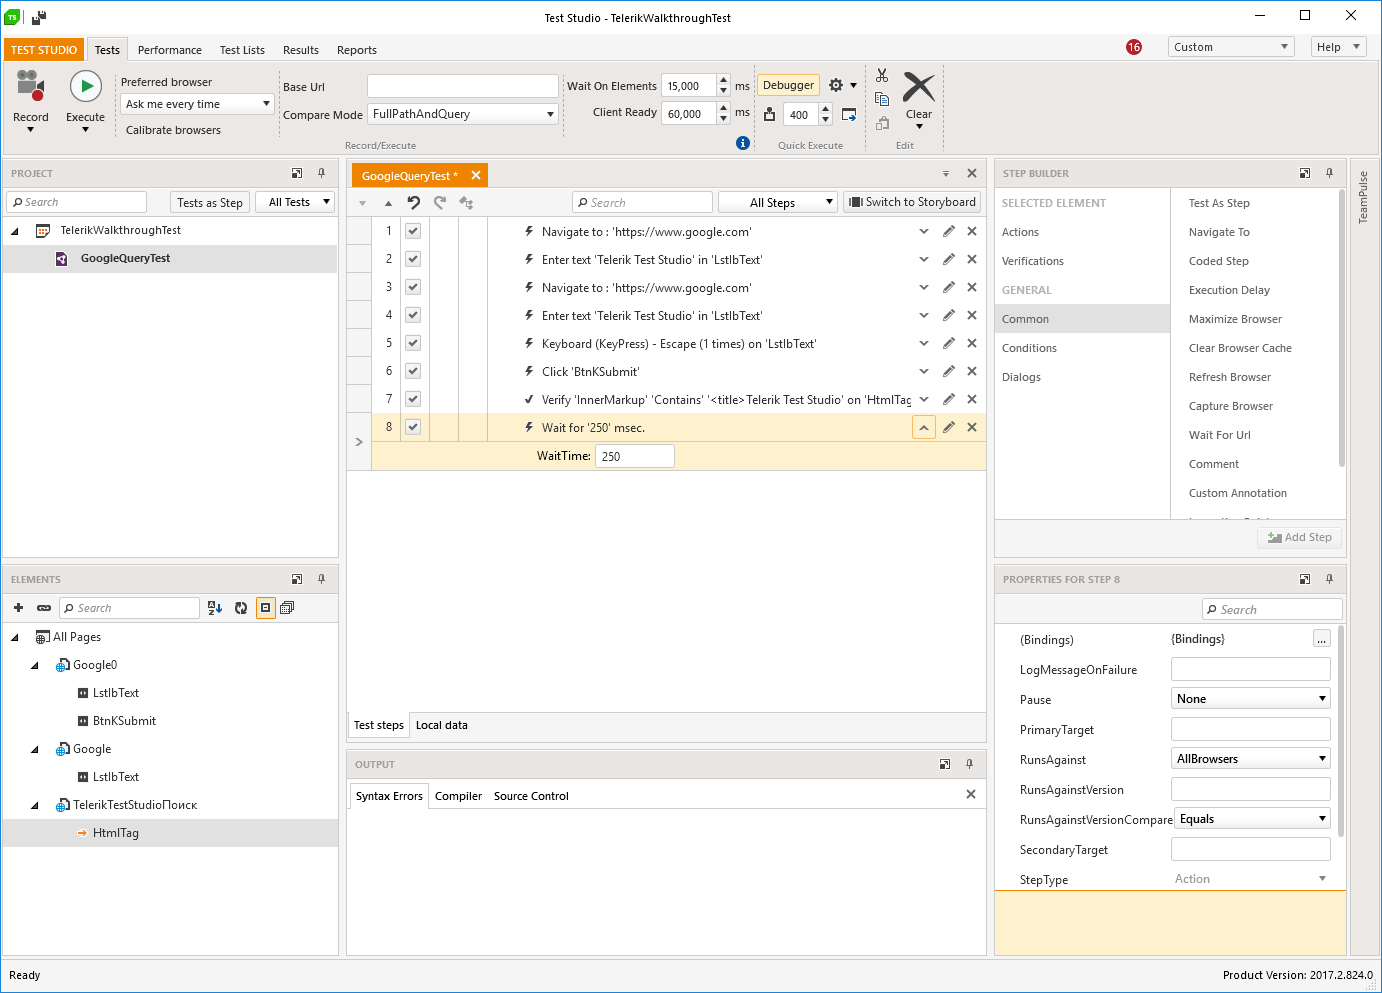
Set execution delay to be 2000 ms. This is generally enough for page to update its source.
Step 15. Let’s get rid of duplicating steps. In case you are insure of what will happen without one particular step, you can exclude it from run order by unchecking its checkbox. When you are sure, that everything is fine without excluded steps, you can delete them.
Remove steps 3 and 4 from execution order. Then, save the test (Ctrl+S), click “Execute” button, choose desired browser and start the test execution.
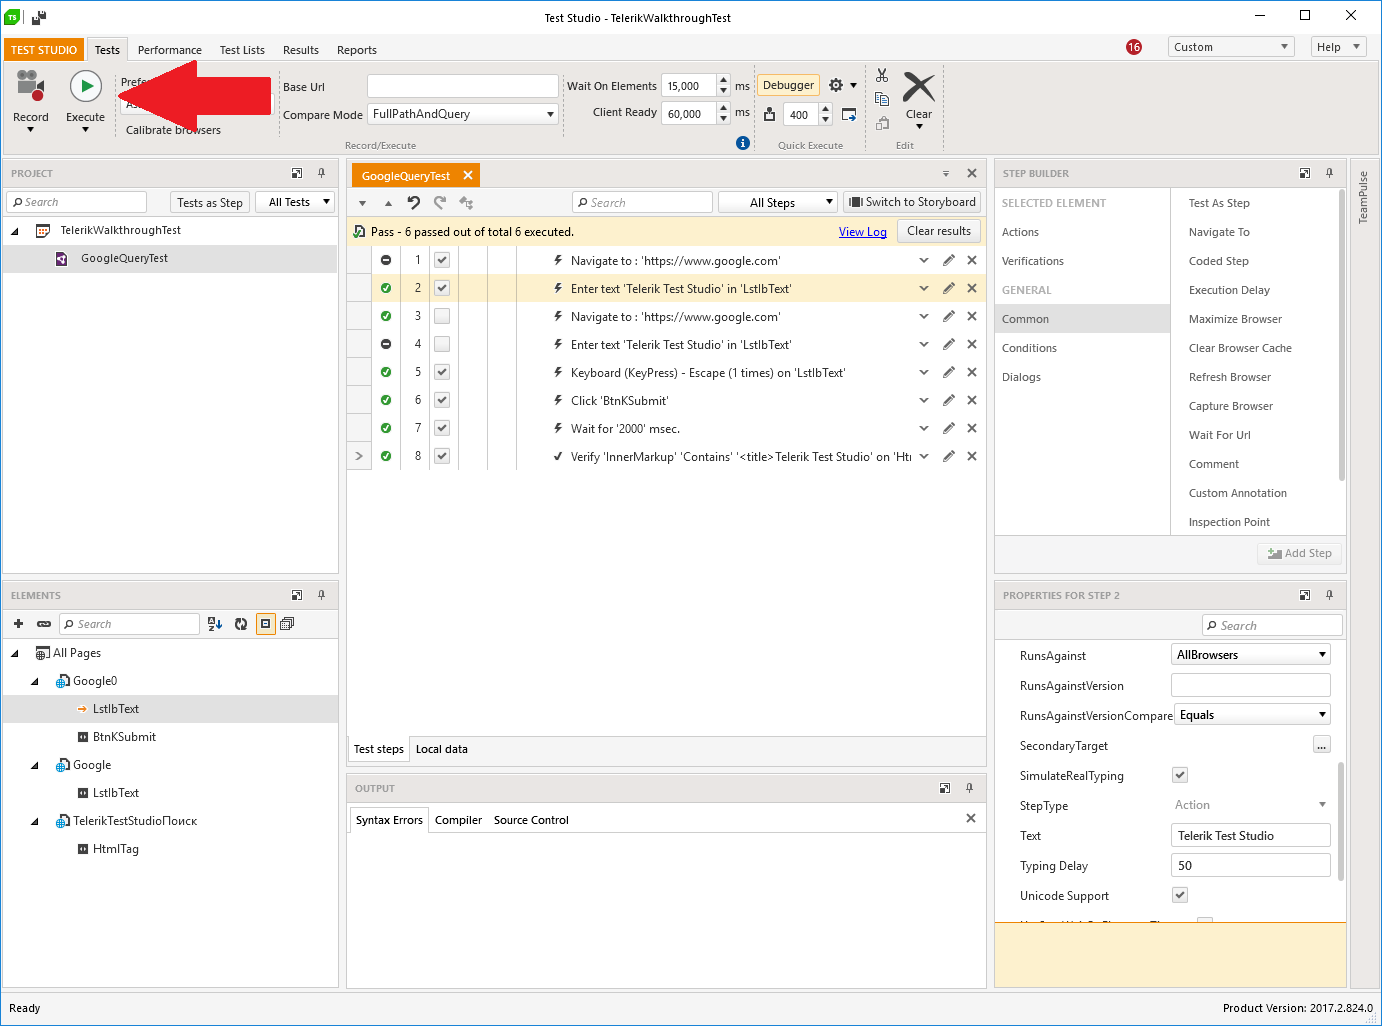

Now, our test is running successfully!

Step 16. Now, delete unused duplicating steps. Select them (by holding Ctrl while clicking) and press “Delete”. Save your changes. That’s it. Now you have your first test in place. In next chapter we will look at ways of improving our test and general good practices.
Advanced features
Now we have our first test in place and it should be similar to this.

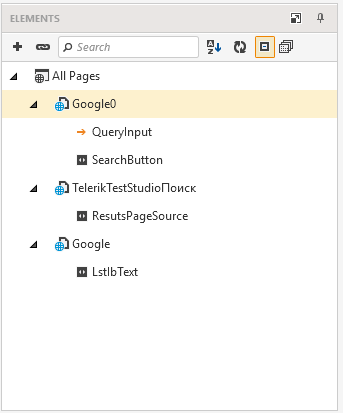
Look at our “Elements” panel.
Although names may vary, they aren’t descriptive in any case. Let’s rename them to make more sense and get rid of unused ones.
Step 1. Right click element you want to edit and click “Rename”. Give more meaningful names to the elements, let’s say “QueryInput”, “SearchButton” and “ResultsPageSource”. You should have this:
And your test steps should be updated accordingly:
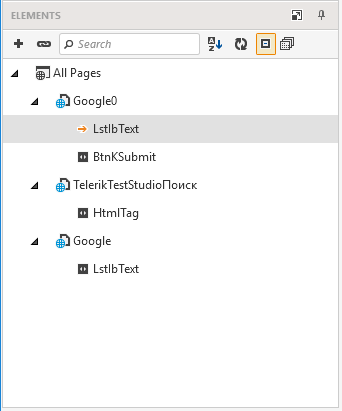
Step 2. Check test steps. If you look closely, 2-nd step uses another element to input text than we are using to press “Esc” in. This is because we have recorded this script in two runs and recorder generated two Page Objects for the same page with the same elements. To check this, select “LstlbText” and “QueryInput” elements in “Elements” panel and compare their “Find Logic” fields:
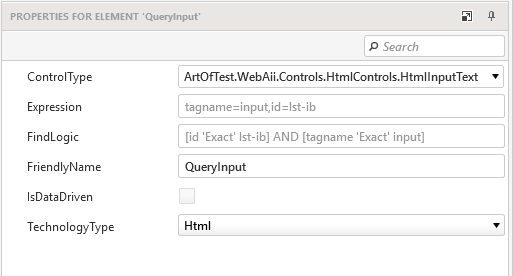
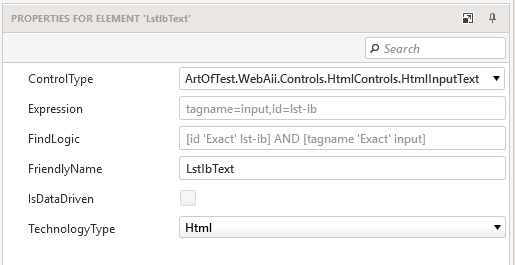
As you can see, these two elements are identical and we do not need both of them.
2.1. Let’s delete “LstlbText”. Before we do so, click our 2-nd test step (one, where we are using “LstlbText”) and see “Properties” panel.
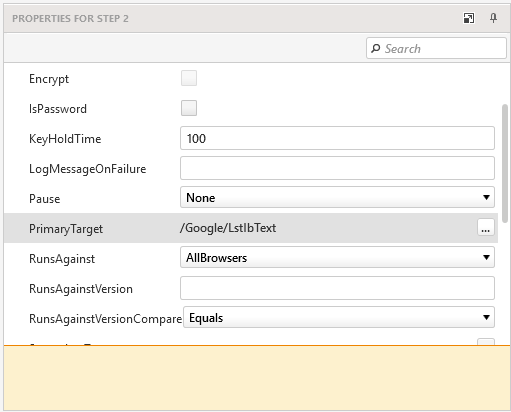
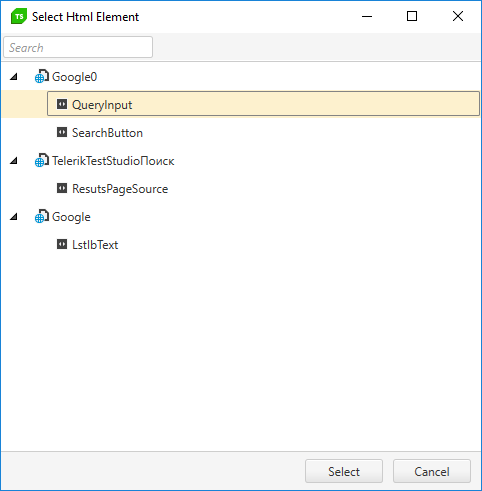
2.2. Scroll to “PrimaryTarget” option and click “…” button.
2.3. In “Select Html Element” choose “QueryInput” and click “Select” button.
Step 3. Right click “LstlbText” item in “Elements” panel and click “Delete”. Since we aren’t using this element anywhere except previously changed step, confirm deletion.

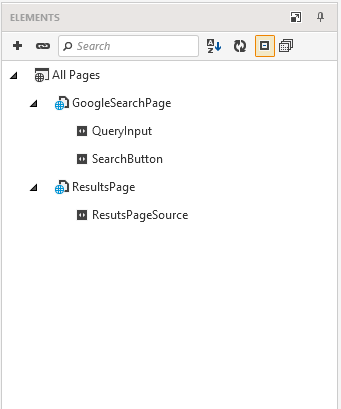
Step 4. Rename your Page Objects. Just right click desired Page Object and click “Rename” option. Give some meaningful name to your Page Objects (for example, “GoogleSearchPage” and “ResultsPage”). Now you should have the following:
This already looks much cleaner and readable, but let’s proceed with improvements.
If we look at our test, we can see that our workflow is:
navigate to the pagе
type search query;
execute search query;
verify results.
This is fine, but what if we are already on desired page at the start of this test because of previous test runs? What if we need to verify search results achieved from some kind of another search form? That’s why we need to separate independent actions and move them to their own tests.
Step 1. In project, create new folder and call it “Steps”. To do that, right click project item in explorer and choose “Create folder” option. In this folder we will place our independent actions that can be shared between tests.

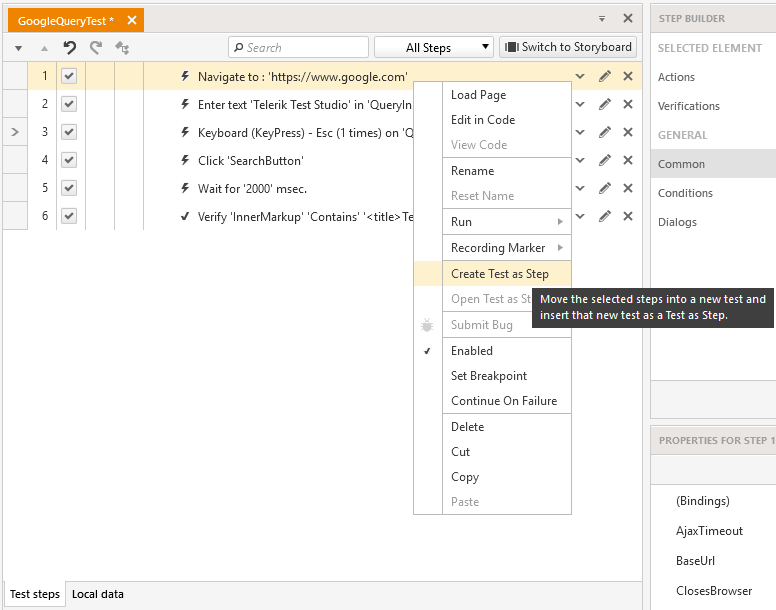
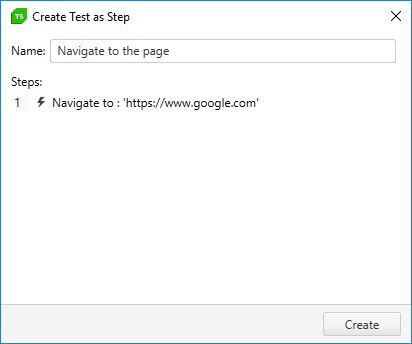
Step 2. In opened test, right click our first step and choose “Create Test as Step” option.
Step 3. Enter the name for a new test and click “Create”
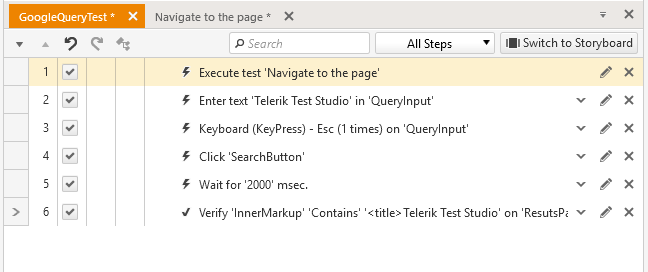
Now, our “GoogleQueryTest” looks like this:
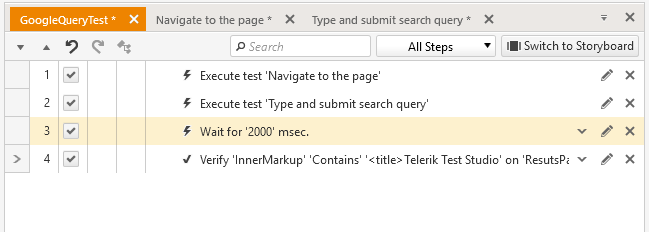
Step 4. Select steps 2, 3 and 4 and move them to another Test as Step called “Type and submit search query”. Now, our “GoogleQueryTest” looks like this:
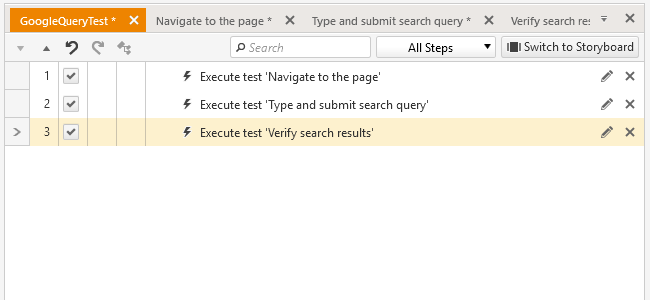
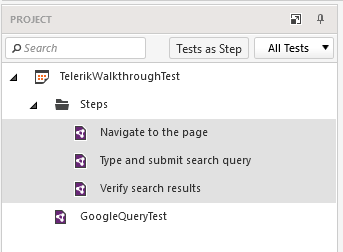
Step 5. Select steps 3 and 4 and move them to another Test as Step called “Verify search results” using technique described above. Now, our “GoogleQueryTest” looks like this:
Step 6. Move created tests to “Steps” folder by drag-and-dropping:
Step 7. Create folder “Tests” and move “GoogleQueryTest” into it:
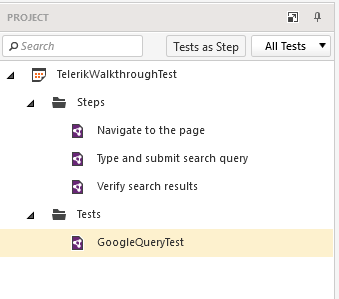
This way, we have made our project far more organized than before. Let’s proceed further with tests improvement. Open “Type and submit search query” test.

Currently, we are typing our search query, then pressing “Esc” key on the keyboard and clicking “Google Search” button at last. This is a fine workflow for, let’s say, “Google Search” button testing. But simulation of real typing is time consuming, as good as executing several others steps. I suggest you to keep a copy of this test in its current state and name it “Type and search via click”. After that, we can make improvements to our original test.
Step 1. Rename original test to be “Type and search via enter” to match its logic.

Step 2. Uncheck “SimulateRealTyping” for the first command in “Type and search via enter” test. This way we will save some time.
Step 3. Open properties for 2-nd step and for field “Key” specify “Enter”:
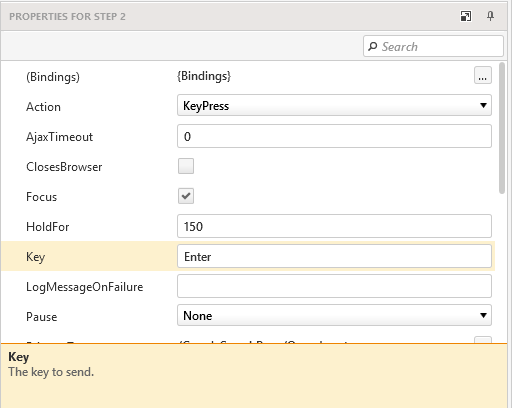
By doing so we will submit our query instantly without clicking “Google Search” button.
Step 4. Because we no longer need the last step, we can delete it. But I suggest you to remove it from execution order at first, then re-run your test script to ensure that everything is fine. After that you can actually delete unused steps.
Now, our tests are better and more reliable. Let’s continue with “Verify search results” test.
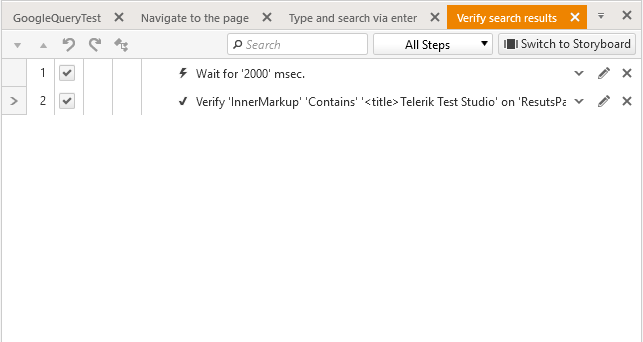
As you see, here we are delaying test execution for 2000 ms and after that we are trying to verify that page with results does contain specific string within its markup. Let’s look at this closely step by step.
Step 1. For numerous reasons, execution delay we are currently using is a bad practice. Mainly due to the fact that you cannot guarantee that desired page or element will be loaded within specified time. Or even if they are, your script may wait longer than you actually need. That’s why we need to use WaitFor steps.
Although you can add WaitFor step when highlighting elements in recorder mode (just hover on element and wait for context menu to appear), I would like to show you the way of doing it in Coded Step. But firstly, we need to understand what are we waiting for. Currently, we are waiting fortag to contain some value. Not only this is incorrect but is also making our tests fragile too. So, we need to wait for some content container on results page to be visible and after that in coded step we will check that page title is one we are expecting.
1.1. Open test “Verify search results”.
1.2. In “Elements” panel right click “ResultsPage” and select “Load Page” option. Choose desired browser and click “Record”.
1.3. In recorder window click “Highlight elements” and hover over container you want. I suggest to hover over results filtering options, as this strip isn’t presented on search page.

1.4. Wait for context menu to appear. After that, click “Add to elements…” option and in popup type descriptive name for this element (for example, “ResultsFilterMenu”) and click “Add element”.
1.5. You may see new page appeared in “Elements” panel. This is a duplicate of “ResultsPage”. To merge them, click duplicated Page Object item and set “CompareMode” to “FullPath”.
Step 2. In “Verify search results” script in “Step builder” under “Common” group select “Coded Step” and click “Add step”. Choose language you are comfortable with (I will go with C#) and click “Create”.
Step 3. In opened editor you will see new coded step function created. Replace it with following:
[CodedStep(@”Wait for page to load and assert”)]
public void Verify_search_results_CodedStep()
{
Pages.ResultsPage.ResultsFilterMenu.Wait.ForVisible(10);
Assert.Equals(ActiveBrowser.PageTitle.ToString(), “Telerik Test Studio – Google Search”);
}
This code will access Pages object of this project (one that stores info about all pages we have created), then grab our ResultsPage and then ResultsFilterMenu element from it. After that, we will wait for this element to be visible up to 10 seconds. In case of menu being visible earlier, we will complete this operation faster.
Second line is used for verification that title of the active browser window is equal to “Telerik Test Studio – Google Search”. We will replace this with data from external data source in the next chapter, for now leave this as is.
Step 4. Save this coded step and exclude steps 1 and 2 from execution order.
Step 5. Open “GoogleSearchTest” and execute it with your browser of choice.
If you followed my guidelines closely, your test script should execute without fail and much faster than before. That means that you can delete all unused steps in your scripts. Now, when you are familiar with some of the advanced features, we can proceed with Data Driven Testing (DDT).
Data Driven Testing
Using external data sources in your scripts is generally a good practice as you do not need to specify any data directly in your scripts and just use names of variables from your data source. For this tutorial we will go with data from .csv file, but you can have a number of other sources, described in detail in official documentation.
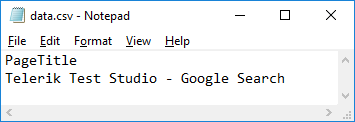
Step 1. Create file “data.csv” in your project folder.
Step 2. Open your file with any text editor and fill it like this (without any trailing whitespaces!):
Step 3. In Test Studio, select your project.

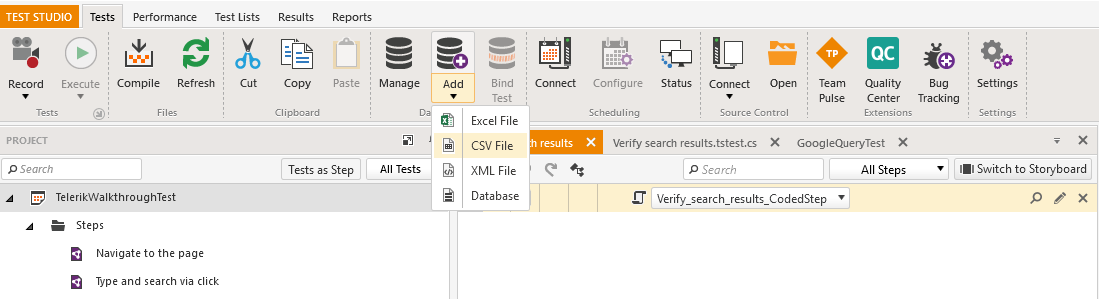
Step 4. In “Data Sources” group, click “Add” button and choose “CSV File” option.
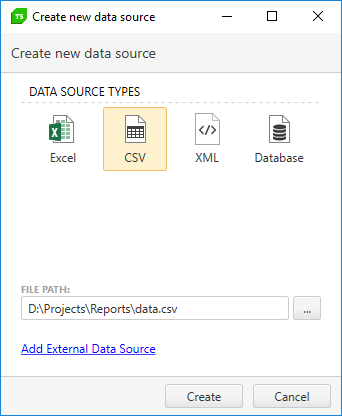
Step 5. Navigate to your data.csv file location and select it:
Step 6. Click “Create”. Now, if you click “Manage” button in “Data Sources” group, you will see your data.csv file within project “Data” folder.
Step 7. Click “Verify search results” test.
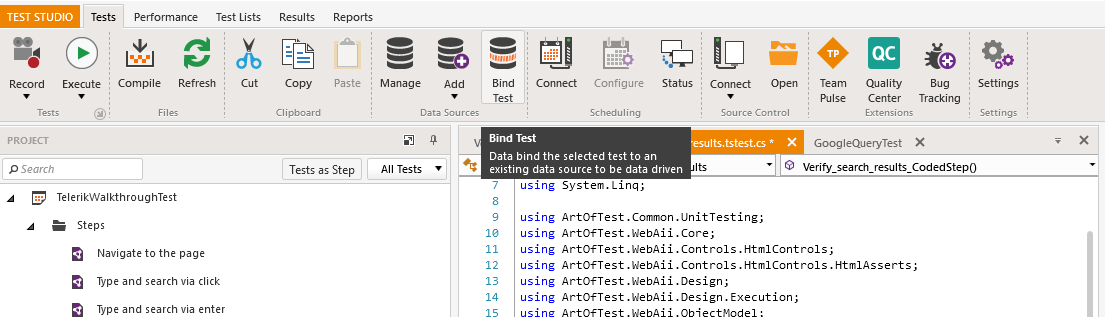
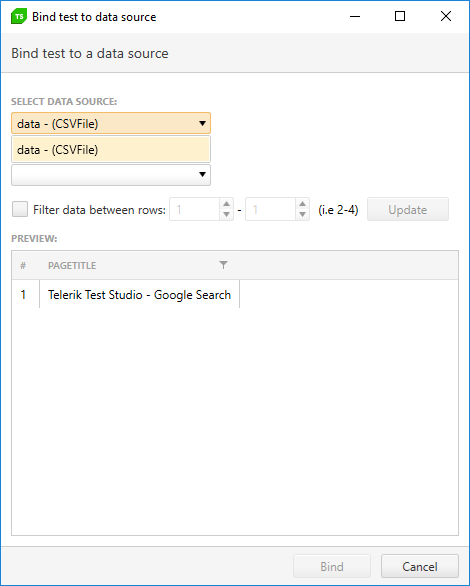
Step 8. In “Data Sources” group click “Bind Test” button.
Step 9. Choose data.csv in “Select data source” drop-down list.
Step 10. Open your coded step and modify its content to be:
[CodedStep(@”Wait for page to load and assert”)]
public void Verify_search_results_CodedStep()
{
object title = Data[“PageTitle”];
Pages.ResultsPage.ResultsFilterMenu.Wait.ForVisible(10);
Assert.Equals(ActiveBrowser.PageTitle.ToString(), title.ToString());
}
So now we are bonded our coded step to data source and can be more independent in what we are verifying.
Step 11. Execute script to verify results.
In similar fashion you can bind data not only to coded steps. To do this, bind data source to desired test, choose a test step you want and modify its “Bindings” property:

Conclusion
After this beginner’s guide you should have some basic knowledge about Telerik Test Studio, test recording and editing, as well as some advanced features of it. I suggest you to continue reading official documentation to discover more features, such as editing of elements find logic or extensive step codding.
Comments are closed.


