
Nowadays there’re a lot of operating platforms: PC, portable console, mobile devices, and many others. Further, we’ll talk about a popular tool that helps to perform mobile game testing for one of the most used mobile operating systems – Android.
We’ll analyze Android Debug Bridge. It is a special software which is available from the command line from Android SDK.
It is worth reminding that Android SDK is a special mobile product development environment for Android OS where you can create and edit any user software.
ADB Installation and Configurations Editing
In fact, Android Debug Bridge is a part of Android SDK Platform-Tools, which is a part of the Android SDK and consists of many different tools for easy interaction with Android OS.
It means that after Android Studio is installed you can use SDL Manager tools and download the newest version of Android Debug Bridge. Then you need to go to the PC system properties and open the “Advanced system settings” tab.
Next, you have to find the “Environment variables” button and click on it. In the list, you’ll see one environment named “path”. Select it and click on the “Edit” button or double click on the line.
You will see “Edit system variable” window where you need to add manually paths to such folders as “Tools” and “Platform-Tools” (using the “Create” button).
Note! If you use Windows 7 OS, then you need to add the paths to the folders in the “Path” line using a semicolon.After all this, you need to restart your PC. In order to check if the installation was correct, you can open the command line and write such a command – adb version. If you see detailed information about this web product, you may be sure: the installation was correct and the system pulled all the changes in.
Also, we would like to admit that special drivers for the ADB interface support via USB should be installed for the correct interaction inside the Windows OS. If you use Linux/FreeBSD, then you don’t need to install the drivers but you should create a udev rule.
Further, we will analyze an order of rule creating (exemplified by Ubuntu).
At first, you need to know the value of the idVendor and idProduct variables of the mobile device. You can do it with the help of Isusb command in the terminal via a preconnected device with PC through USB. You have to see the following command – Bus 002 Device 006: ID 12d1:1038 Huawei Technologies Co., Ltd.
Here idVendor is hexadecimal digits between ID and the colon, and idProduct is another set of numbers after the colon.
Now you have to create a /etc/udev/rules.d/51-android.rules file with the chmod 644 rules and the following content:
SUBSYSTEMS==”usb”, ATTRS{idVendor}==”12d1″, ATTRS{idProduct} ==”1038″, MODE=”0666″, OWNER=”user”.
Run the following command:
$ sudo /etc/init.d/udev reload
In the case of PC that’s the whole process of installing. If we are talking about the mobile device, then the USB debugging should be turned on: «Settings-Application-Development-Debugging via USB».
Important! If you want to get all ADB features on your device, you must have root-rights and installed Busybox (you can download it on the Google Play Store).
In order to interact with the ADB on your device you have to edit some parameters in its system. We won’t stop on the algorithm how to do it correctly because the process of installation in every mobile device is different (it depends on the manufacturer, year of release and the software version). But we can distinguish the main steps to reproduce:
- Open the folder with settings on the phone and go to the “About phone” section;
- Click on the number of build 7 times;
- Open the Developer options tab in configurations;
- Activate manually the “Debugging via USB” option.
ADB Use in the Field of Software Testing
Despite the fact that Android debug features are available for ordinary PC and mobile devices users, in most cases this tool is used during mobile games and app testing for mobile operating systems.
This product has many useful features but we can distinguish the most important and relevant of them:
- Opportunity to see a list of all current connections with PC as well as their readiness to the work with ADB system;
- Add or Remove software on the mobile device;
- Work with device’s logs;
- Data transmission from device to PC and vice versa;
- Data cleaning;
- Bug report writing;
- Right of access to the device and so on.
According to some of these features, it may seem that ADB functionality is huge. But in fact, it is a simple tool for Android SDK which is indispensable during the mobile products testing.
Further, we will talk about main commands which allow to fully implement the functionality of the ADB.
Main ADB Commands
At first, it may seem that ADB setting is very difficult and long process but it’s not true. Moreover, the friendly graphical interface helps users to do something by themselves.
When you install it you will have a lot of useful and capable functions which are so helpful during mobile software testing.
Let’s take a look at some basic commands:
- ADB start-server – the start of services operations.
- ADB kill-server – this option is opposite to the first one and can stop the command.

Adb start-server and kill-server
- ADB devices – it shows the list of all connected devices mentioning their serial numbers and system statuses.
- ADB bug report – it allows creating zip archives with the whole debugging data in the simple text format (.txt).
Adb devices and bugreport
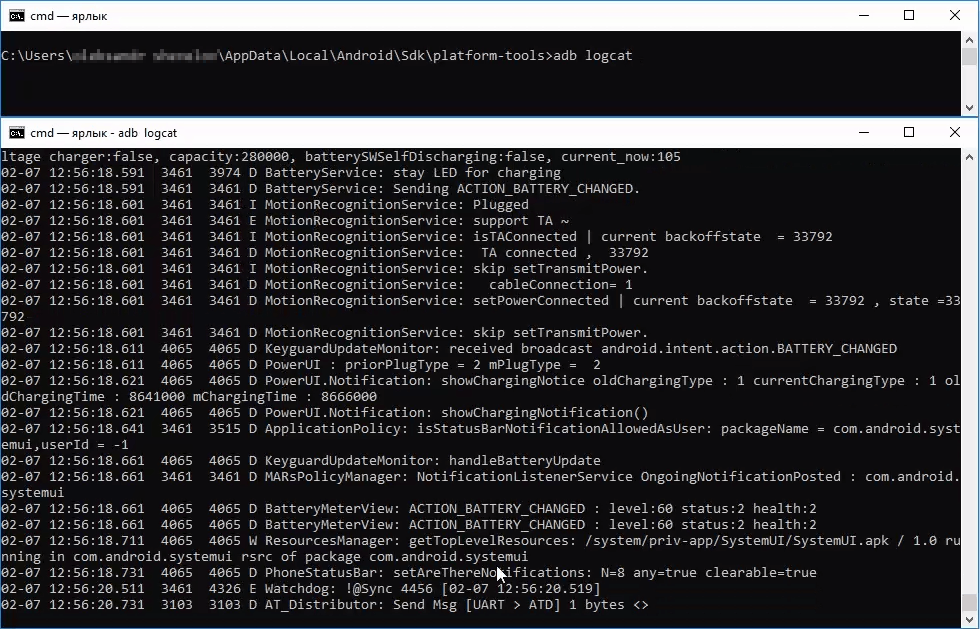
- ADB logcat – one of the most popular command in the Android Debug Bridge during the mobile software testing. It allows viewing the logs from the device as well as writing the logs in a separate file or watching them in the command line window in the Windows OS.

Adb logcat
- ADB shell screencap – such a command allows editing the device’s screenshot. It is worth noting that after you type a command, you have to specify the path, name and filename extension for the future screenshot (for example, /sdcard/screencap.pnj).
- ADB shell screenrecord – the capability to record a video from the screen of a mobile device without using of another software. In a manner similar to Adb shell screencap, you have to specify the path, file name, and its system format.
- ADB install – it allows to install the suites of applications. For the installation, you need to specify the path, filename and filename extension (for example, C:\cat.apk).
Adb install
- ADB push – is a special command for copying information from PC to mobile device.
- ADB pull – copying files from the device to the PC system.


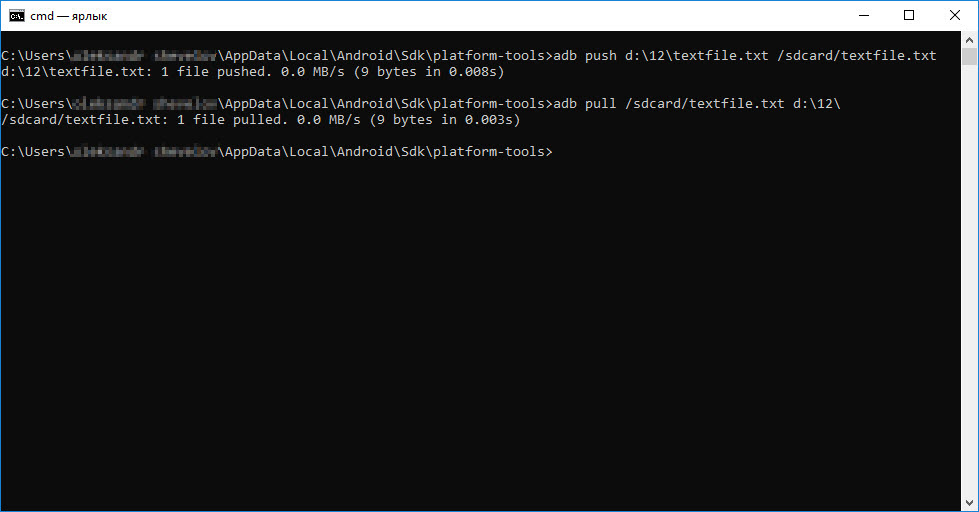
Adb push and pull
The Most Popular Options for the Commands in ADB
You can add some codes to the most commands in ADB. And these codes can edit the assignment of the particular function.
Let’s analyze some of them:
- adb logcat > d:\12\logsname.txt – typing the logs into the logsname.txt file in the d:\12\ directory;
- adb logcat -s Unity > d:\12\logsname.txt – typing the filtered logs into the logsname.txt file in d:\12\ directory;
- adb install -s d:\cat.apk – the capability to install the app right on the SD card in the device.
Conclusion
In the field of mobile testing services, the Android debug bridge is the indispensable tool for the console testing of the mobile software. With its help, one can implement many useful and relevant system commands which allow testing the common functionality of the developed product.
Someone may think that such an installation is difficult but actually it isn’t. Moreover, you will recognize its maximum benefits.


Leave A Comment